|

|

|
|
|
|
|
| Home | Manuals | Supplies | Search | Consult | Contact | Testing | Service |
| This link leads to exchanges I've had with people about re-tubing a trackerbar. It's worth reading because it contains tips and tricks that I might have missed in the treatise below. -Click Here- |
|
IMPORTANT NOTE: This only applies to trackerbars with 88 note holes. The note Middle C on the stack corresponds with note hole #40 on the trackerbar. When tubing a transposing trackerbar, the most important thing is that the right edge of the Middle C hole is exactly 5-1/8" from the left edge of the music roll. (Naturally, this assumes that the transposing trackerbar is in the center position.)
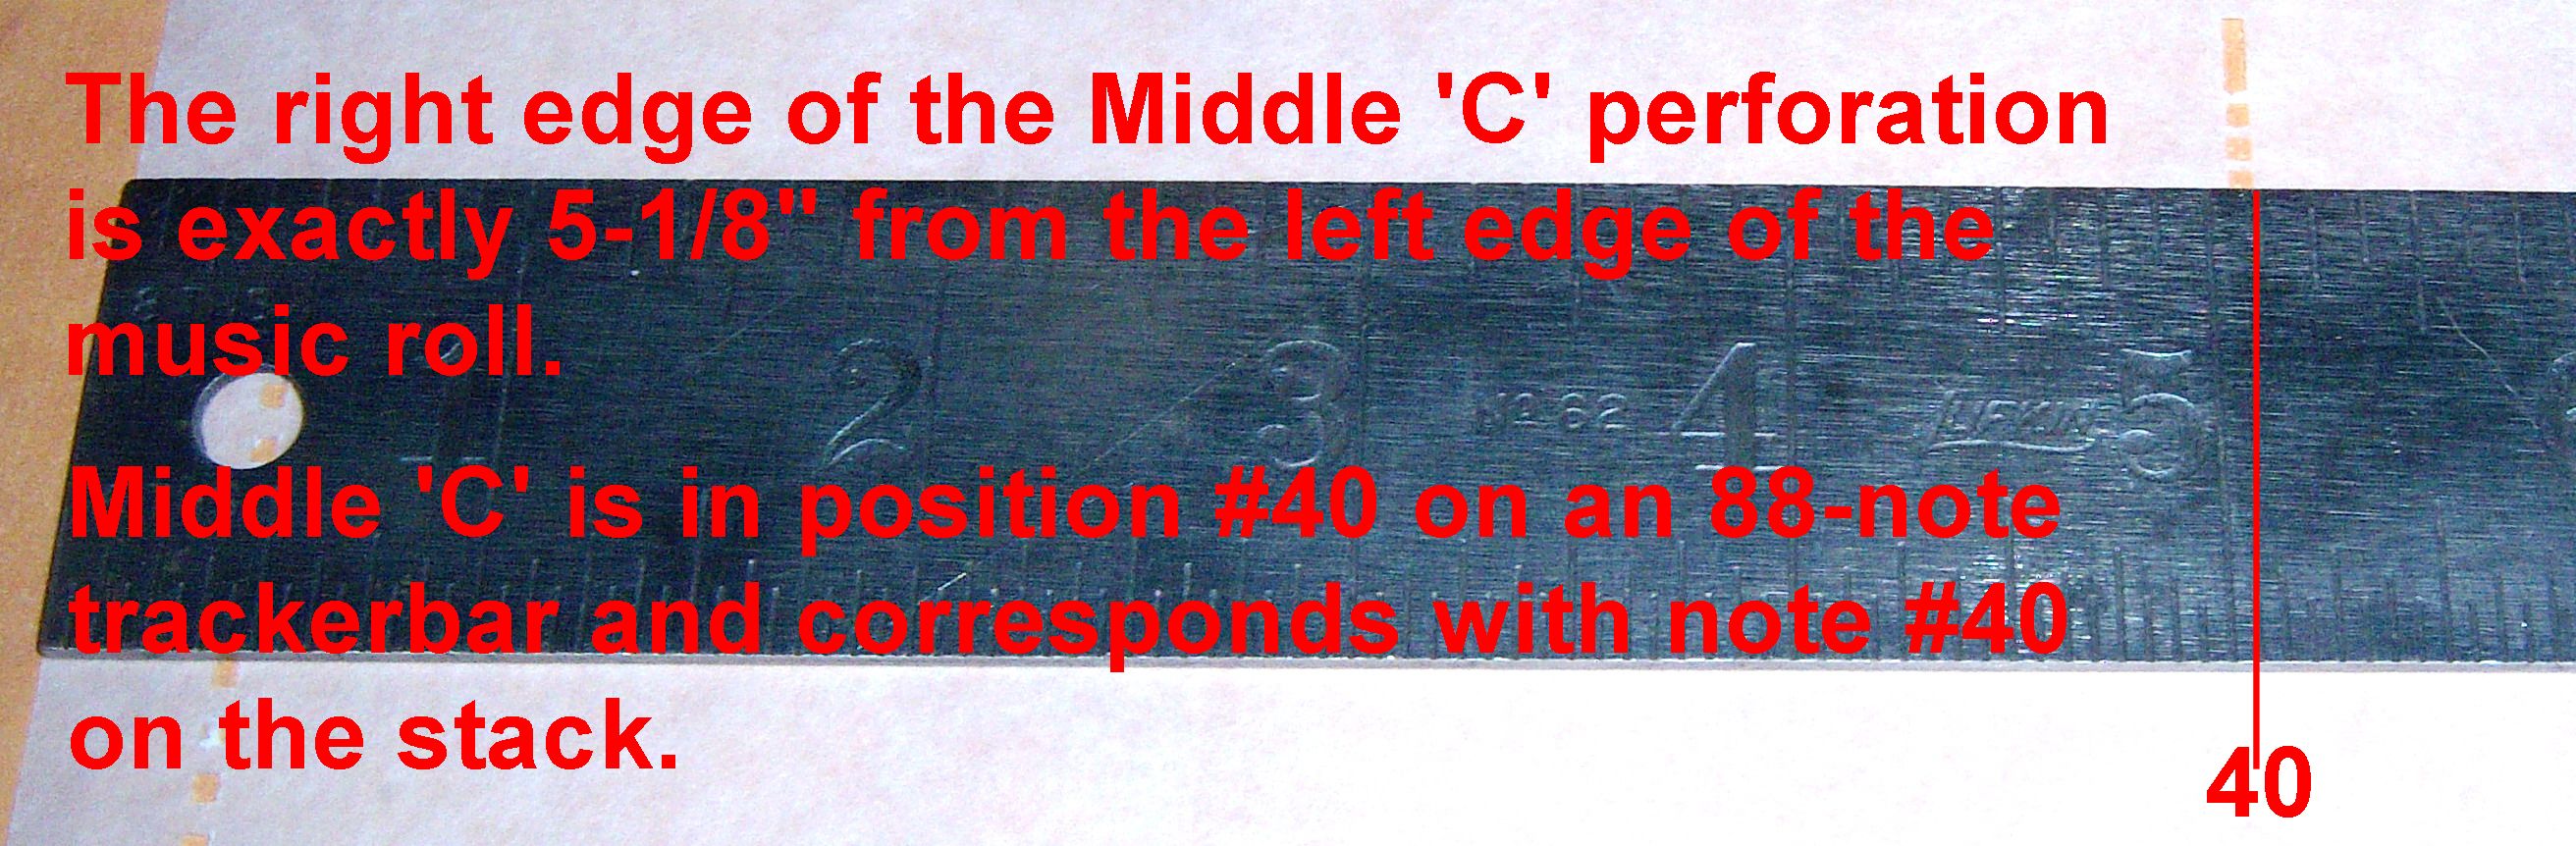 After I've identified Middle C on the stack and note hole #40 on the bar, I stick a toothpick in note hole #40. Then I count the number of notes on the stack from Middle C down to the first playing note on the stack (on the bass end). (In player work, the notes are always numbered from the lowest bass note, or #1, to the highest treble note, #88.) In units that have a transposing trackerbar, it's common for the stack to only have 83 playing notes. But, some manufacturers start with note #3 (or the note B1 on the piano) in the bass and others start with note #4 (note C1 on the piano). So, by counting backwards from #40 down to the first playing note on the stack, you can figure out which note on the piano corresponds with which hole on the trackerbar. It's important to figure all of this out before you start tubing the bar because you don't want to get half way done and then find out you're one hole off in one direction or the other. The procedure below refers mainly to units with rubber tubing between the trackerbar and the lead tubing or rubber tubing from the trackerbar to the stack. However, most of the information is also applicable to units that have lead tubing from the trackerbar to the stack. The following set of pictures has been re-sized so they will fit onto this page. The original pictures (each 160K in size) are available by clicking on the picture. You will have to use the "BACK" feature on your browser to return to this page. To insure the best looking job possible, it is imperative that you measure, as best as you are able, the existing tubing lengths from the trackerbar to the other end of the lead tubing. It would be ill advised to attempt replacing the trackerbar tubing using this treatise without reading the ENTIRE treatise first. Taking a few pictures and lots of measurements will always help insure a better looking job. Also, if you have lead tubing from the trackerbar to the stack, you will need special reducing nipples and about 150 ft. of trackerbar tubing. Furthermore, you will have to ream out the holes where the lead goes into the wood with a drill bit to insure a tight fit. 
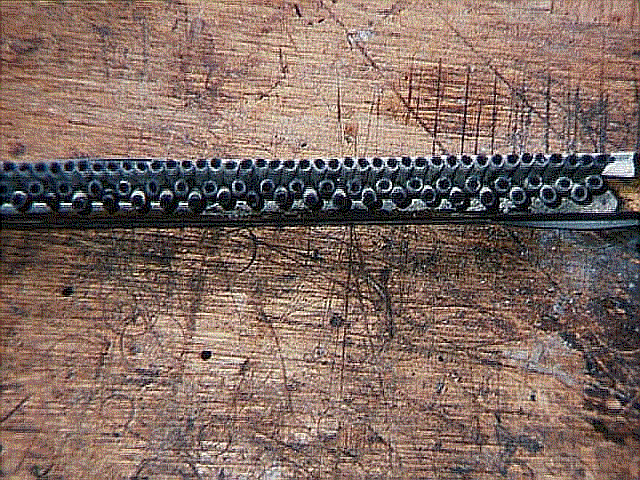
 In this picture, the trackerbar has already been removed from the mechanism and the tubing has been broken off at the nipple. You'll notice that half of the nipples on one row have been bent out of their original position. This was done with a drill bit that fits almost snugly into the nipple. They need to be moved approximately 1/8"-1/4". After bending the nipples, I submerge the trackerbar in gasoline and leave it outside for three days or until the tubing gets so soft that it basically falls off. Sometimes a stiff wire brush is needed to remove stubborn pieces and in rare cases, a knife, or other cutting tool, will have to be employed to clean away all evidence of the old tubing. There's a video which shows how this is done -click here.
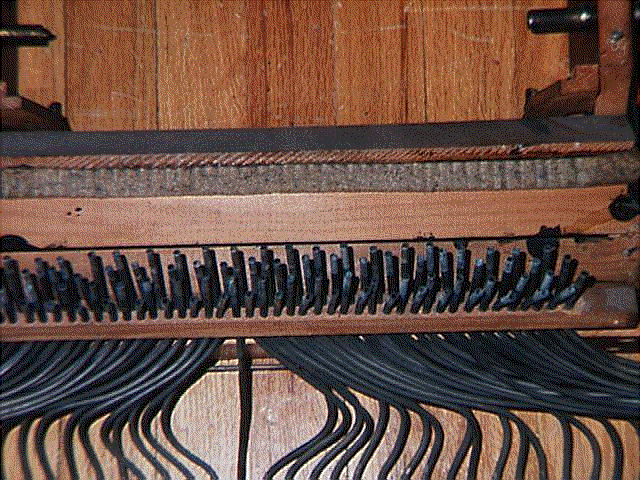 Here, both rows (at the receiving end) have been properly 'bent' out of position, allowing easy access for installing the new tubing. Like the trackerbar, there were only two rows of nipples. Now there are four, so to speak.
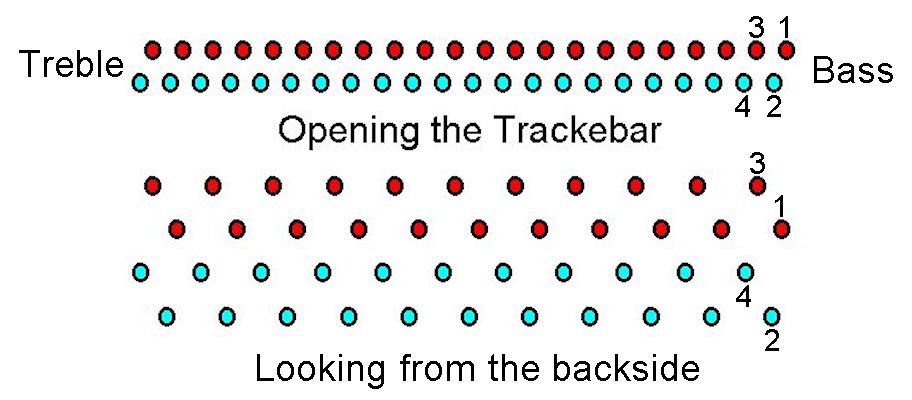
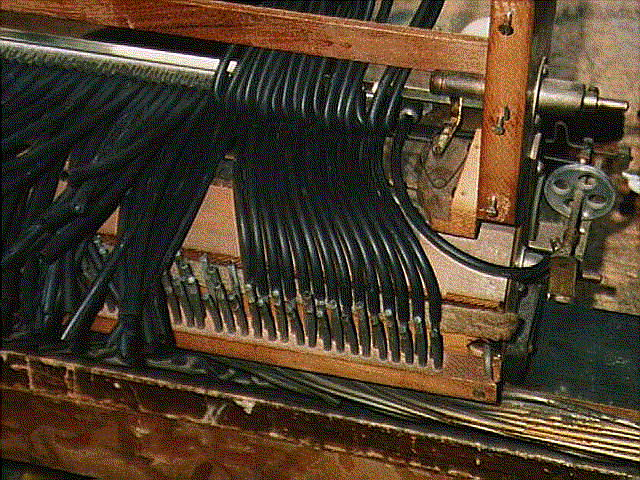 Once the bar has been cleaned and polished, I pre-size, cut and install all the tubing on the tracker bar and put it back in the mechanism. It is in your best interest to cut the tubing a couple of inches too long. It's easy to cut a little excess off but quite another matter if they are even a little bit too short. It is noted here that this is NOT the only way to continue the process and admittedly there are cases when it is easier to install the bar without any tubing and retube each note one at a time. In that case, it is advisable to start tubing from the center of the bottom row and work your way out to the ends. The pattern I follow is basically back-and-forth in that I install a tube on the right of center and then the left of center and progress outwards to the ends. If you attempt to switch between the lower and upper row of nipples instead of completing the bottom row first, the tubing will not lay correctly since the upper row of tubing must lay on top of the lower row as it did originally.
 This picture is here for only two reasons. First, it shows what the tracker bar looks like when it's polished. Second, and more importantly, it shows the method I use to keep the upper row of new tubing out of the way while I am connecting the bottom row to the stack. The piece of wood is cut just long enough to apply pressure on the walls of the spoolbox. Just about anything that will keep the upper row out of your way will work just fine.
And here's another way!!!!
Accessing the 'Bar'
Removing the Trackerbar
Removing the Rubber Tubing from the Lead Tubing
Removing the Bottom Access Panel
Removing the Bottom Row of Rubber Tubing
Measuring the Replacement Tubing: Part One
Measuring the Replacement Tubing: Part Two >
Installing the First Row of Rubber Tubing
Connecting the New Tubing to the Lead Tubing -Bottom Row
Connecting the New Tubing to the Lead Tubing -Bottom Row
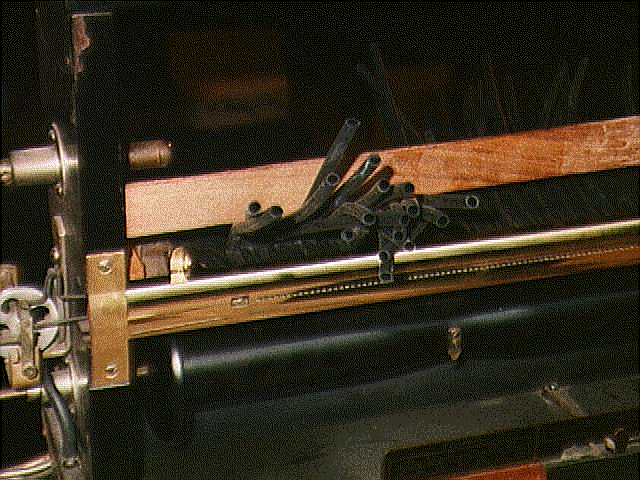
Installing Tubing on the Top Row of the Trackerbar
Compressing the Tubing on the Trackerbar
Finishing the Installation If you've seen my videos about retubing a transposing trackerbar, then you only need to know the following: Cut all of the lead tubing about 2" back from the trackerbar and remove the bar from the spoolbox. Option #1, soak the trackerbar in denatured alcohol for three days -or until the sealant gets soft. Then, using a brush, brush off as much of the sealant as possible. Next, using a box cutter or other sharp knife, cut a 3/4" slit in every piece of lead tubing where it connects to the brass nipple. Pull off the lead tubing. NOTE: Soaking the bar in gasoline softens the sealant faster, usually overnight, but it could take awhile to get rid of the smell. Option #2, using knives and picks, chip away the sealant. cut the slit in the lead tubing and pull it off. Option #3 -ONLY FOR THE BRAVE! Using a heat gun, heat up the sealant and pull off the lead tubing. BEWARE, if you get it too hot, the solder that holds the brass nipple in place will melt and you'll pull off the nipple. Getting them soldered back in place is a work of art. I use gasoline and then I soak the clean bar in lacquer thinner for a day to get rid of the smell of the gas. Then I carefully polish the bar before installing it and retubing it.
I have posted other pages which endeavor to explain the process of tubing the tracker bar. The pages are at:
HI Joe,

Sounds good. It's going into the technical tips.

John
=================================================

At 06:52 PM 8/28/99 -0500, you wrote:
John--Found a real quick and clean way. Take a Wagoner heat gun and it will
soften the rubber, but not the lead. Use caution tho. I tried to melt a
piece of lead tubing, and one really has to hold it on it for quite some
time before it will melt the lead. Went to the old rubber and it gave up
right away! Old stupid me will try any thing once ! Give it a shot------it
works out real good-------------Thanks  JOE
-----Original Message-----
From: John A. Tuttle
To: Joe & Doris
Date: Saturday, August 28, 1999 6:17 PM
Subject: Re: lead tubing


Hi Joe,

The best way is to break away the majority of the tubing, up to
about 1/2" from the lead. Then locate a drill bit the just fits
into the lead tubing. Careful not to push it in too far. Then
use needle nose plyers and break/crack the rubber, and pick out
pieces. I use dentist picks.

The other way involves gasoline... and is a little dangerous
and messy. But it's not much work. Basically dissolve the
rubber by soaking it in gas. And all the lead tubing has to
be removed from the upper section, spoolbox, etc.

If the tubing is not terribly hard, you should try pushing the
tubing further on. That's right, ON. Then sort of pry it off,
using the wooden feed-through board as the focal point. I have
a mini crowbar about 5" long, but a screwdriver can do the job.

I must say I play each re-tubing by ear. It really depends on how
stubborn the tubing is. Most often it's, 'crack, pick, crack, pick'.

Have Fun,

John
==========================================


At 03:42 PM 8/28/99 -0500, you wrote:
Hi John--Tried to send a min. ago, but had wrong add. Is there any way to
remove brittle tubing from the lead tubing on a Simplex Transposing
system? The lead tubing 'seems' to be excellent. Really hate to re-tube the
whole system, mainly because there is so little clearance between the player
stack and the piano action. Any suggestions would be helpful.
               JOE
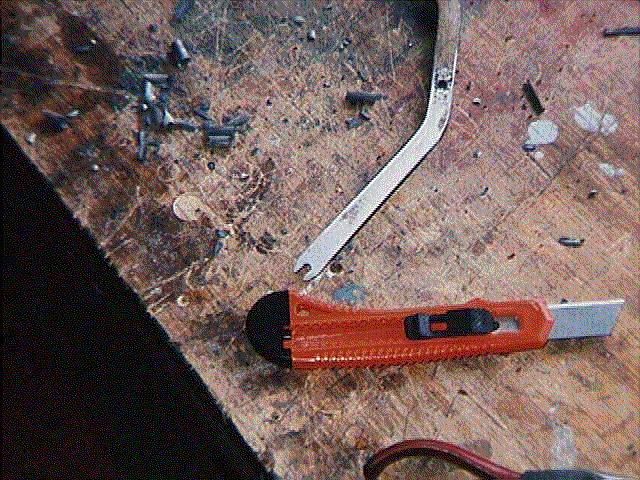 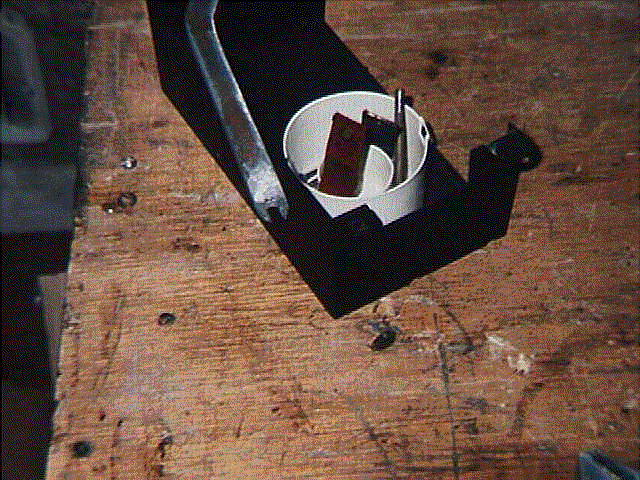 This tool was hand made from a piece of 1/4" X 5/8" steel stock. After cutting the groove in the center (9/64"), the inside edges of the groove were beveled to create a knife sharp edge. To use the tool, insert the groove, with the beveled edge down, behind the old tubing and wiggle and pull the old tubing off. The device is similar to the tubing puller sold by Player Piano Co., but it is MUCH stronger and it has the knife edges which will cut any old tubing to bits. Notice the pieces of old tubing on the bench. That's all that was left.  ...Back to Top ...Back to Top
ALL Comments and Suggestions for this page are welcome....To Contents Page
We Gladly Accept These Cards
For The Accuracy or Validity of the Statements and/or Opinions Expressed within the Pages of the Player-Care Domain. Cartoon Graphics by "Eric Styles"
|