
|

|

|
|
|
|
|
| Home | Manuals | Supplies | Search | Consult | Contact | Testing | Service |


Making Pouches
|
|
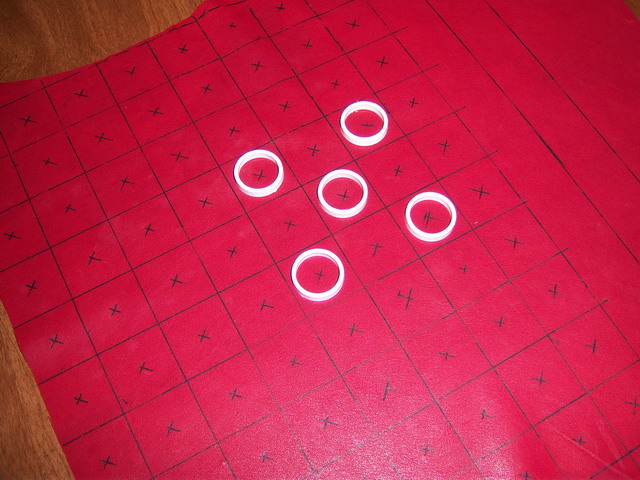
the Modern Universal Player Piano While there are numerous steps involved in the restoration of the modern Universal stack, the one that presents the greatest challenge and is, no doubt, the most difficult and time-consuming, is the replacing of the pouch rings. Until around 2008, this job was fairly easy because replacement pouch rings (with the pouch already glued to the ring) were still available through Story & Clark. Now that the plastic rings are no longer available, one of the few options left involves removing the old rings and using them again after they have been recovered with pneumatic leather. After trying two of the techniques that have been developed, I decided to develop my own technique, which can be replicated without the use of any special tools. Perhaps the scariest part of the whole process is removing the old rings. This is because there is absolutely no room for error. If even one ring gets damaged or broken, you will end up with one less note that works, or you'll have to employ some other technique. (I might cover that problem at the end of this treatise.) However, having successfully removed the old rings from three units to date (6/16/2014) without any problems, I believe my technique is easy enough to do that I feel confident others can do it too. As you'll see in the video below, the process requires nothing more than a screwdriver. However, the screwdriver has been modified slightly. In the simplest of terms, the sharp edges have been rounded with a metal file. This was done to greatly reduce the possibility of gouging the underside of the plastic ring. In only two cases (out of the 250+ rings that I've removed) was the upper-side of the ring slightly dimpled by the shaft of the driver. To date, none of the undersides of the rings have been marred. Below is a short video that shows how I remove the rings. .
The next step in the process has to do with cleaning off the old pouch. Most simply put, I believe the safest and easiest way to do the job involves sandpaper. Personally, I use a small belt sander with a rather used 120 grit belt. I attack this phase of the job very delicately. My goal is to remove the old pouch without removing any of the plastic. This requires a soft touch, steady hands, and patience, but you do have a slight amount of room for error here. The final goal is to remove all of glue on the ring while keep the bottom of the ring flat. The video below shows how I do the job, but I would recommend that beginners use 120 grit sandpaper and an extremely flat surface, like a piece of plate glass or flat piece of metal.
This next phase is the final step in the cleaning process. While there are certainly a number of other ways to handle this phase of the operation, I find that using a box cutter is the easiest way to get the job done without damaging the ring.
Now we're ready to start making the new rings. The first step in this process is marking the pneumatic leather. The leather I use comes from Columbia Organ Leathers. It is their CML -Columbia Maroon Leather, which is also known as "Aeolian or Morton" Style leather. I use 'Extra Thin', which is 0.008"-0.010" thick. (This leather is NOT air-tight, but we'll solve that problem later in the treatise.) You will only need one square foot of the leather. (It says at their website that they sell 6" x 12" strips of the CPL leather. I've never asked if they will also sell strips of the CML, but it doesn't hurt to ask. I buy full skins.) With regards to marking the leather, I make them 1.2" square. The rings are 1" in diameter. So, you could make them smaller. However, I would advise against doing that because, as you'll see in the video below, you run the risk of having to deal with contorted (or warped) leather. At 1.2" square, you can get 100 pieces out of one square foot of leather. Lastly, I recommend cutting the leather in strips as opposed to cutting it into individual squares. You'll see why in the video. Here's what the leather looks like when it's been fully marked. *Added note: Mark the FLESH side of the leather, not the HAIR side. Also, the ring gets glued to the flesh side with PVC-E glue or Plastic Glue.
Gluing the Ring to the Pouch Leather with PVC-E glue. Now we're getting to the final stages in the manufacturing process. I use a 1" Arch Punch to trim away all of the excess leather, but a good pair of sharp scissors will do the job just as well. (It will just take a little longer.) Once the excess leather is out of the way, the last step is bevelling the edge of the ring ever so slightly. This can be done on the belt sander or by hand. See the two following videos.
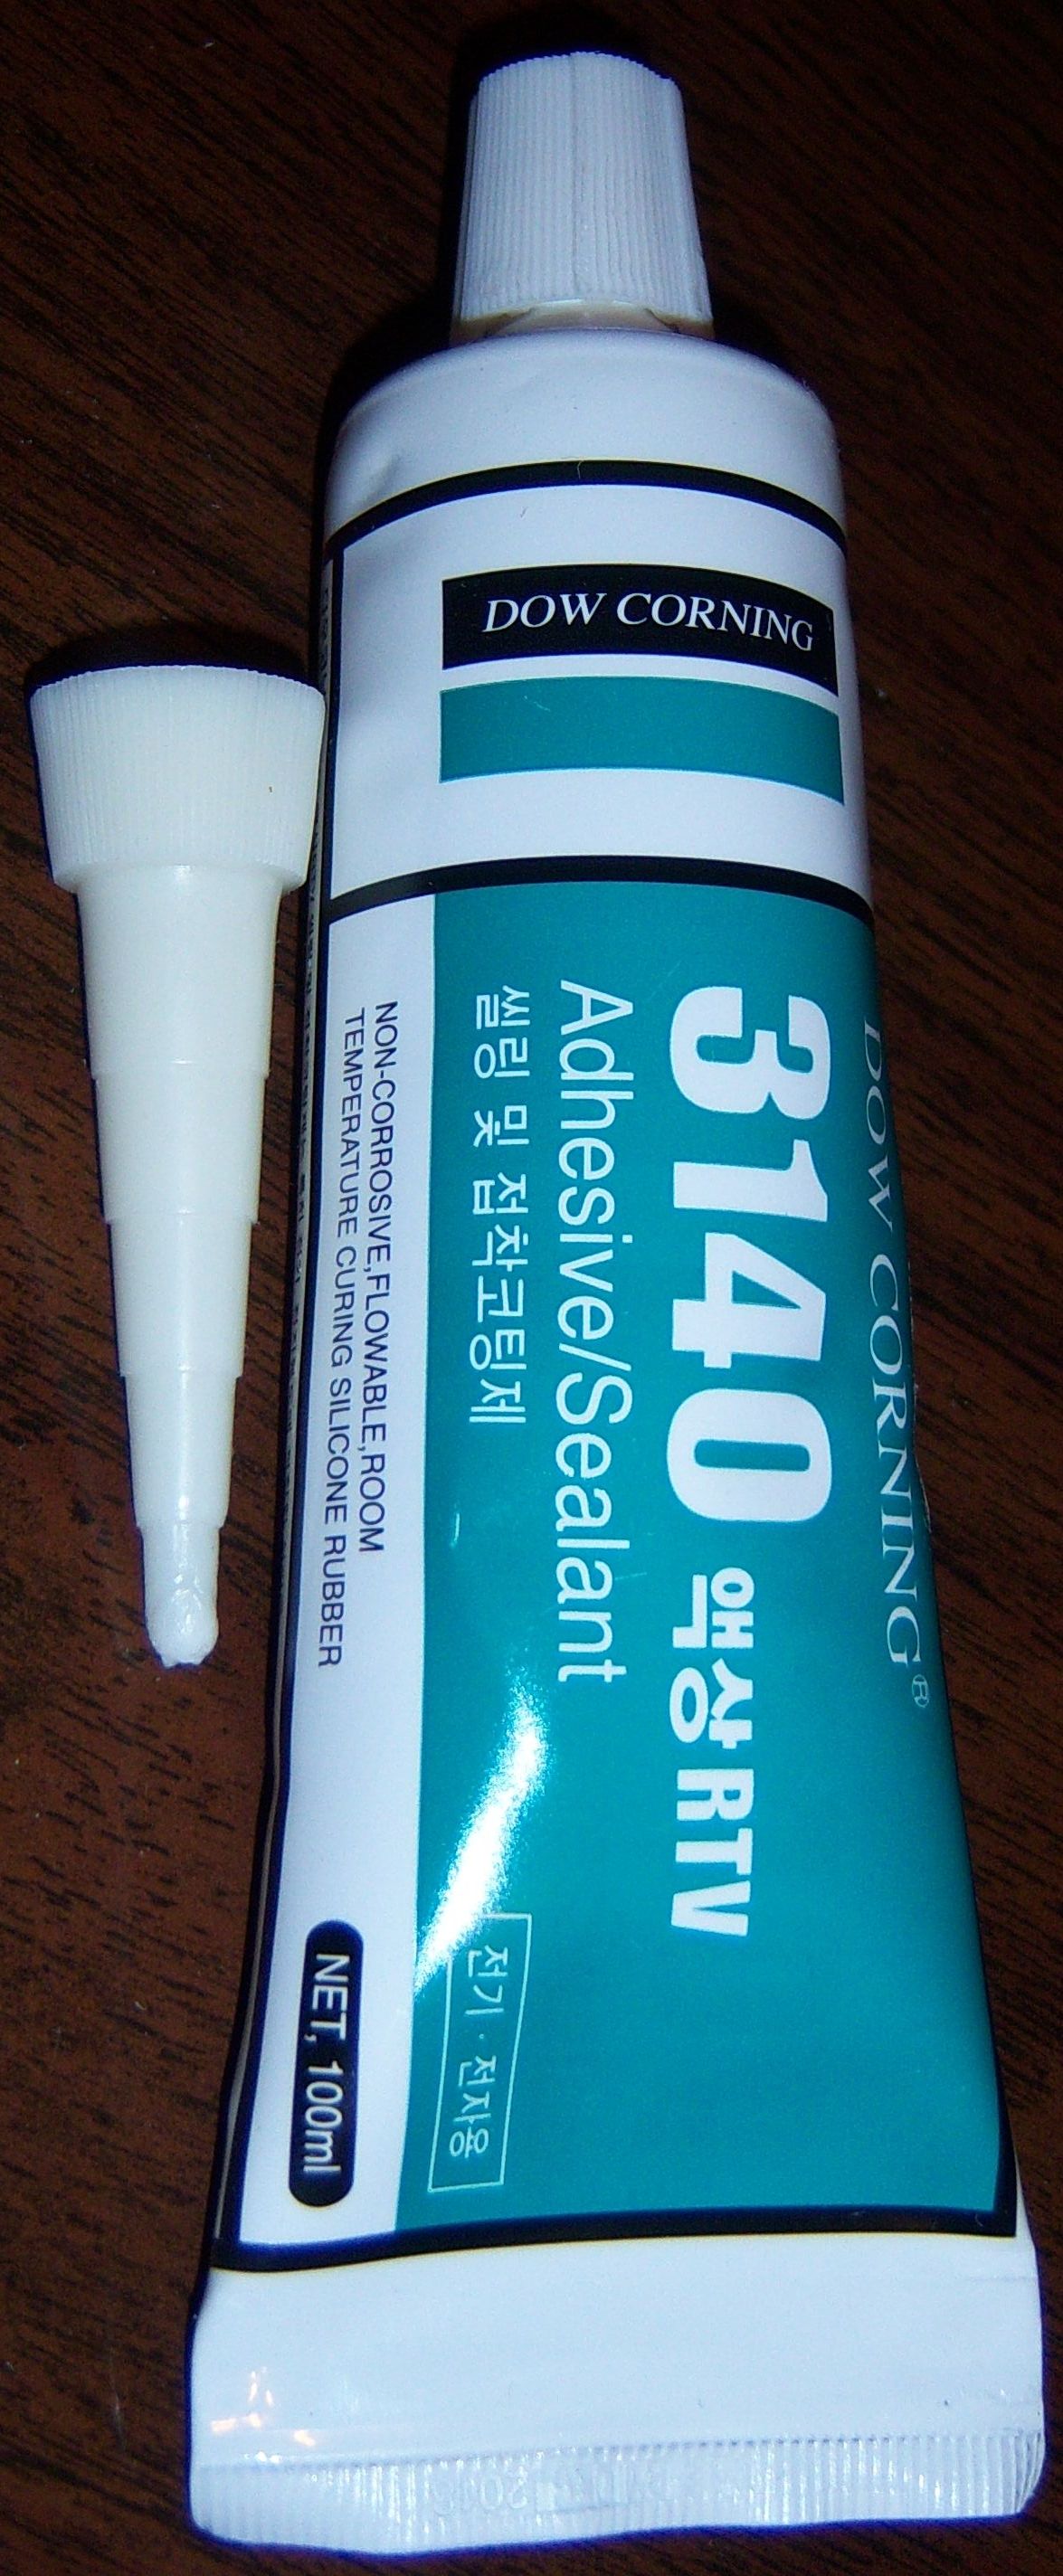
The last step in the process involves sealing the pouches. As mentioned earlier, the leather is not air-tight, and that's a problem because the Universal stack was designed for air-tight pouches. As you'll see, sealing the pouches is a painless procedure. However, it requires a very specific type of RTV that's made by Dow Corning. It is their product number 3140 RTV Adhesive/Sealant (100ml). .
In the next segment, we'll put the rings back in the stack and seal them. I'll also show you a few other procedures that need to be done when restoring the stack. Then we'll assemble each section of the stack and test it. Click Here to go to the next segment.
|

|
Since "Player-Care" is an internet business, I prefer that we correspond via E-Mail (click here to fill out the 'Request Form'). However, if I'm not in the middle of some other activity, you can reach me at 732-840-8787. But please understand that during the hours from 8AM-5PM EST (Mon-Sat), I'm generally quite busy. So, I probably won't answer the phone. If you get the answering machine, please leave a detailed message stating the reason for your call. Also, repeat your name and phone number clearly and distinctly. By necessity, I prioritize everything in my life. And, if you call and just leave your name and number, and ask me to call you back, it might be a day or two before I return your call. Why? Because I don't know why you want me to call and I might not be prepared to assist you in an effective and efficient manner. If you leave me an E-Mail address (which I prefer), spell it out phonetically. The more you do to help me, the more I can help you in return. Don't rush. You have four minutes to record your message. |
|
407 19th Ave, Brick, NJ, 08724 Phone Number 732-840-8787 (Voicemail Only, No Texts) |
