In my continuing effort to help those who are rebuilding their own player piano, I have come up with a relatively easy way to set the valve travel (or valve gap) in units that have block-type valves or removable valve caps.
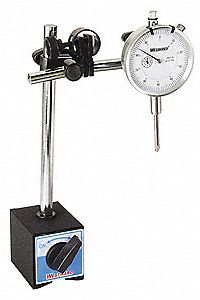 While there's no doubt that dial indicators are a must for accurately measuring valve travel, they are of only limited value when setting the valve travel. This is especially true when it comes to block valves that have removable caps (or exhaust/atmosphere valve seats). That's because the standard method for adjusting the travel typically involves using shims, disks, or rings (donuts) of paper that get placed under the valve seat or under the exhaust valve facing. And, since it's really not very practical to have a huge assortment or these 'adjusters' in sizes from 0.001"-0.050", it's common to have 1-3 sizes, i.e. 0.005", 0.010", 0.012". The obvious problem with this approach is that the valve travel won't be uniform from valve to valve.
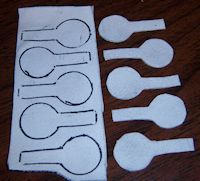 So, I came up with an easy way to accurately set the valve travel that involves nothing more than a scrap of soft leather. The term used to describe this 'tool' is "paddle". The term was coined by John Grant after I asked him about 3-D printing the tool out of flexible rubber. And while the flexible rubber paddle proved to be too stiff, the term stuck. There's nothing complicated about this tool. As you can see in the picture, it looks somewhat like a ping-pong paddle. The round part is the same diameter as the valve facing and the 'handle' is long enough to reach through the hole in the block valve.
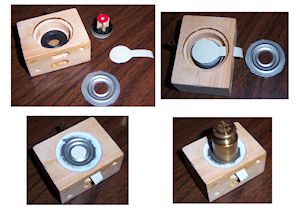 As you can see in the picture to the right, setting the gap is really quite simple. The brass weight is needed to keep the valve plate flat against the valve facing while the glue is drying. After the glue has dried, the paddle is simply pulled out through the hole in the block valve. And, since it's so flexible, it slips out quite easily. The real beauty of using soft leather is that leather skins are not normally very uniform in thickness. In fact, in the picture above, which shows ten paddles, the thickness of the leather varied from 0.025"-0.040" from one end to the other -a distance of only eight inches. So, you end up with a variety of paddles of various thicknesses, for various makes of valves.
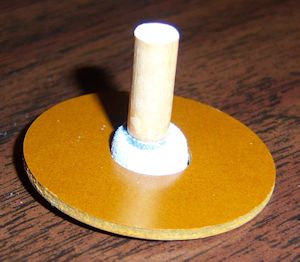
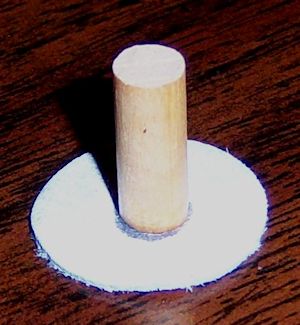 There are a number of other makes of valves that utilize 'removable' caps where the paddle-type gap setter doesn't work. That's because there's no hole for the 'handle'. However, it was found that the idea of using soft leather to establish the correct gap could be fairly easily adapted to accommodate these types of valves. The simplest of these is just a circle of leather, that's the same diameter as the valve facing, and a small wooden dowel. The dowel, in the picture on the left, was glued to the leather with a Cyanoacrylate Adhesive (superglue, krazyglue, etc.).
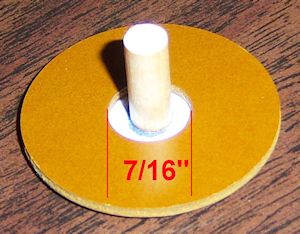 The pictures on the right show what the tool looks like when covered with the cap from a Gulbransen valve. As you can see, the center hole is only 7/16" in diameter. The diameter of the leather circle is 3/4", which is actually bigger than the 5/8" valve in the Gulbransen. However, as you can also see, there was no problem pulling the leather circle through the center hole.
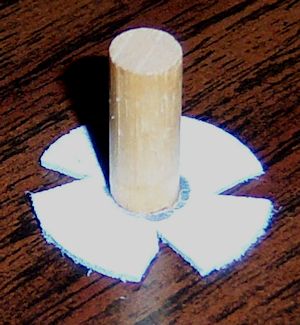 Later I discovered that putting slits in the leather made it much easier to remove the tool.


