
|

|

|
|
|
|
|
| Home | Manuals | Supplies | Search | Consult | Contact | Testing | Service |
|
Hey John...
Sorry to bother you once again...
One big question I forgot to ask in the last email :
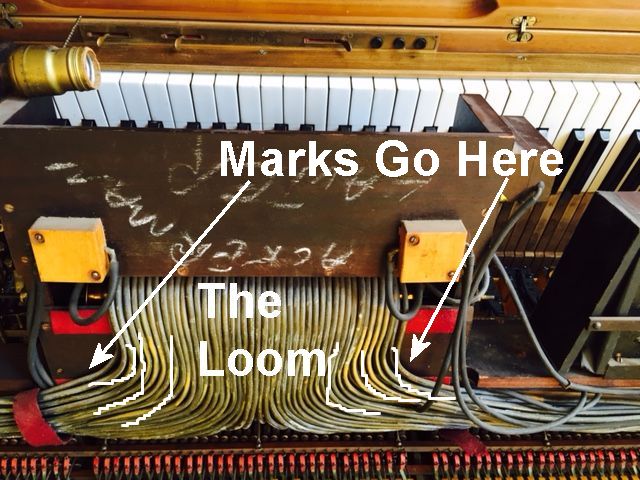
How do the upper and lower rows of tubes coming from
the tracker bar, correspond to the three rows of tubes
going into the stack ??? I would guess there is of course
a pattern for each key, but from looking at the existing
tubes I can't seem to tell a pattern...
Please don't laugh at me too much here John, this is the
first time I have ever really look close at a player...
Thanks for your help...
Best regards.....Rick
Hi Rich, "When in doubt, mark it out!" I use tooth picks to make sure I keep the numerical sequence straight. First note hole on the trackerbar equals the first playing note on the stack. But I always (and I mean ALWAYS) start from the center of the trackerbar (hole 44 from the left and hole 44 front the right) and work my way out to the ends. Going back and forth on the right, then the left. That makes developing the 'pattern' (as it were) for the tubing quite easy. Naturally, you have to count the number of playing notes on the stack and mark them the same way you did the trackerbar. (If you have less than an 88-note stack*-see Note 1) I have even written the note numbers near where the tube gets connected to the stack to avoid confusion. Always (and again I mean ALWAYS) double-check yourself. After you're certain you have one end of the tube connected to the right nipple on the tracker bar, pre- size and cut the tubing to the desired length (where it will connect to the stack -and leaving an extra inch or so to make slight adjustments). Then try to blow air through the tube. If the tooth pick is in the right hole on the trackerbar, air flow will be greatly restricted. Then connect the tube to the stack -making any final adjustments in the length so that the tubing follows a pattern that is as close to the original pattern as possible. To hold the tubing in position as it makes the odd turns to the left or right, I use a hot melt glue gun with the synthetic glue sticks and tack the underside of the tube to the wood. Also, try to let the tubing follow its most natural bend. This requires that you think about which direction the tubing will be headed when you cut it off the roll. Then, when you put the tubing onto the trackerbar, be conscious of which direction it wants to lay. If it's laying in the wrong direction, twist it right or left on the trackerbar nipple until it's laying the right way. (Or, take it off and try again....) Note 1: If you have less than 88 playing notes on the stack, you have to figure out where Middle C is one the stack, and clearly mark it. To insure that the correct nipple (on the trackerbar) gets connected to Middle C, remember that Middle C is always the 40th hole from the left on an 88-note trackerbar. Musically,
John A Tuttle
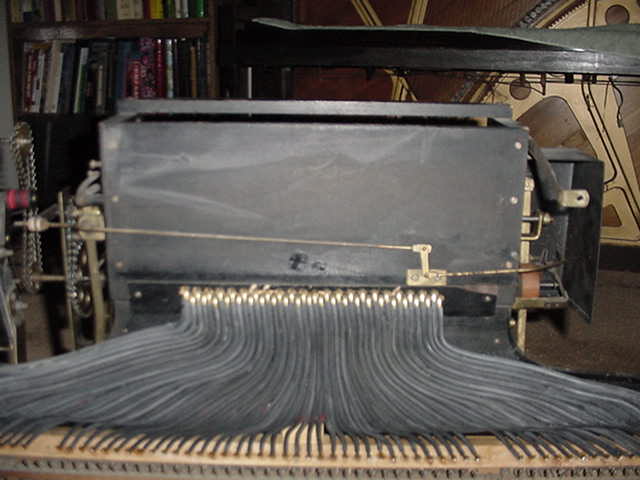
 Marking before starting
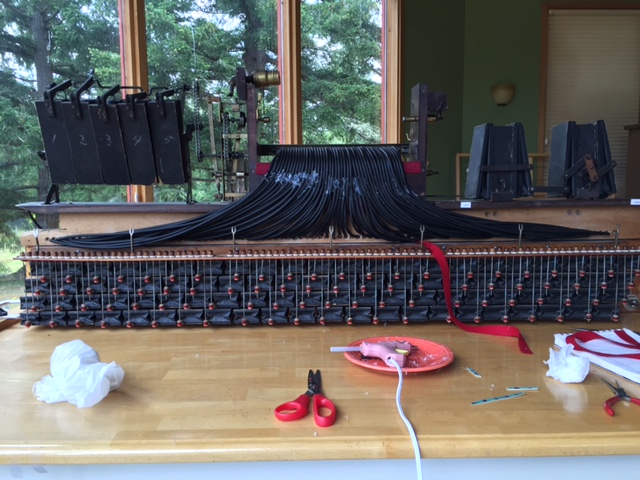 Securing the tubing in place with hot melt glue
 Here's a Simplex I did using the hot melt glue technique Note that you don't see any of the hot melt glue. That's because the glue is only on the underside of the tubing. By applying a bead of the hot melt glue where the tubing will be placed and then pushing the tubing into that bead while it's still hot, the bead almost become invisible. You have about 10-15 seconds to place the tubing. So, make sure you're ready to lay it down before applying the bead. Also, it's wise to make the length of tubing a little bit longer than what's needed. You can trim off the excess after the glue sets. Another important point is remembering that the original tubing was "layered". Usually, there are two layers of tubing. I refer to them as "bottom" and "top". When laying the tubing, do the entire bottom row first. Start in the center and move outwards, alternating from left to right (or right to left) instead of doing all of the tubes on the right side or the left side. This will help you create a very even pattern (or loom). As you proceed, each tube will be snug up against its neighbor, just like the original lead tubing. |
| Player Piano Reference Materials - Click Here |

![]() ..To
The Top of this Page . . . . . . . . . . .
..To
The Top of this Page . . . . . . . . . . . ![]() ..To The HOME Page
..To The HOME Page
|
Since "Player-Care" is an internet business, I prefer that we correspond via E-Mail (click here to fill out the 'Request Form'). However, if I'm not in the middle of some other activity, you can reach me at 732-840-8787. But please understand that during the hours from 8AM-5PM EST (Mon-Sat), I'm generally quite busy. So, I probably won't answer the phone. If you get the answering machine, please leave a detailed message stating the reason for your call. Also, repeat your name and phone number clearly and distinctly. By necessity, I prioritize everything in my life. And, if you call and just leave your name and number, and ask me to call you back, it might be a day or two before I return your call. Why? Because I don't know why you want me to call and I might not be prepared to assist you in an effective and efficient manner. If you leave me an E-Mail address (which I prefer), spell it out phonetically. The more you do to help me, the more I can help you in return. Don't rush. You have four minutes to record your message. |
|
407 19th Ave, Brick, NJ, 08724 Phone Number 732-840-8787 (Voicemail Only, No Texts) |
