
|

|

|
|
|
|
|
| Home | Manuals | Supplies | Search | Consult | Contact | Testing | Service |
|
While every part of a reproducing player system is important, certain parts are often more problematic than others. The Duo-Art Reproducing Player System is no exception, and having been a member of the Mechanical Music Digest for 20 years (as of 2016), I've noticed that the subject of roll tracking has come up hundreds of times. I've also noticed that the Duo-Art roll tracking system seems to have a relatively bad reputation or (excuse the pun) bad track record in terms of reliability. Why is that? In examining the comments made by others over the years, there's seems to be somewhat of a general consensus that the main problem with the system is the use of 'tracking fingers'. No doubt, the designers of the fingers did the best they could, but the inherent problem is the pressure that the finger spring exerts on the edges of the music roll. In order to sense the position of the paper, the polished metal fingers are constantly rubbing on the edge of the paper, and over time, this wear out the edge of the roll to some degree.
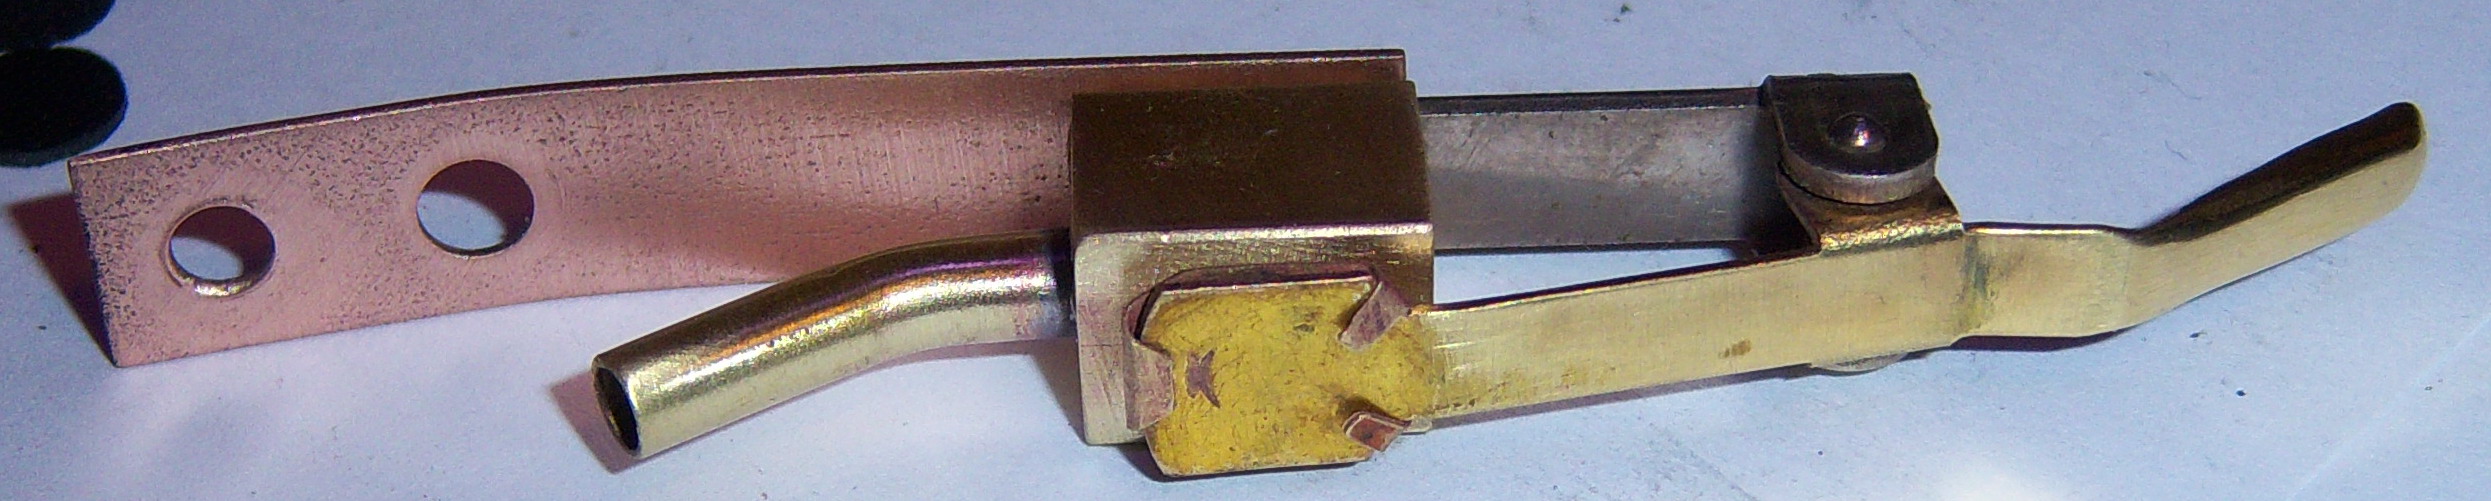
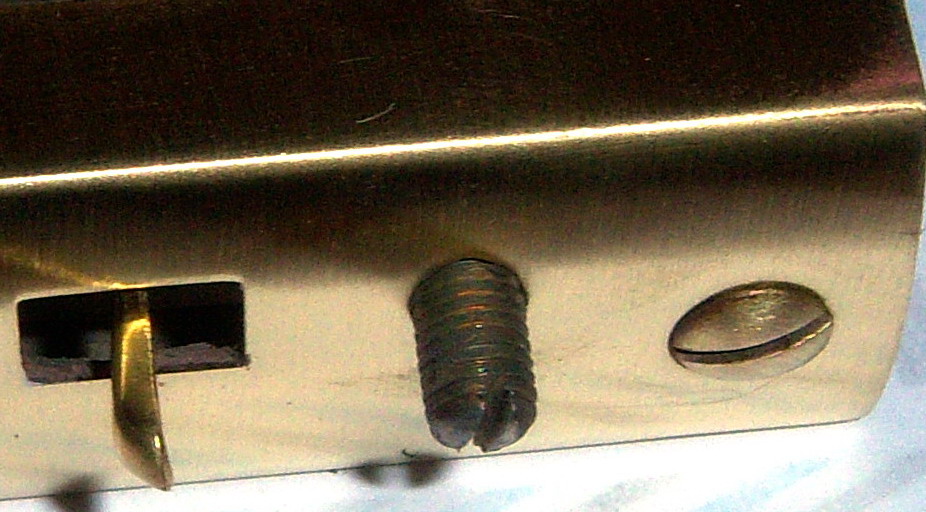
 A second problem is that music rolls aren't all exactly the same width. While they were standardized to 11-1/4" about 100 years ago, errors of +/- 1/16" are not all that uncommon. And, since a tracking finger only has to move 0.010" to open its corresponding tracker valve, a wide roll can hold both fingers open constantly. While this situation causes the tracking device to 'center', it is no longer 'tracking'. So, if there is any imbalance in the tracking bellows or the valves, the roll will be constantly off track. If the roll is too narrow, both of the valves will be closed. Here again, this causes the device to 'center' and it won't start tracking until the roll moves far enough in one direction or the other to move the tracking finger. By then, the holes could be so far off center that many, or all of the notes have ceased working. Below is a picture of the tracking finger assembly as it is mounted to the trackerbar.
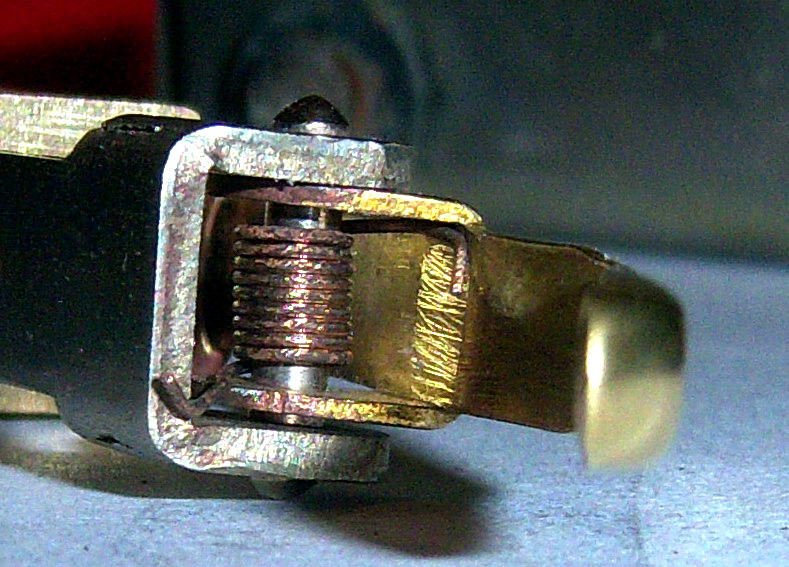
However, Aeolian realized this was a potential problem. So, they added an adjustment (see below). 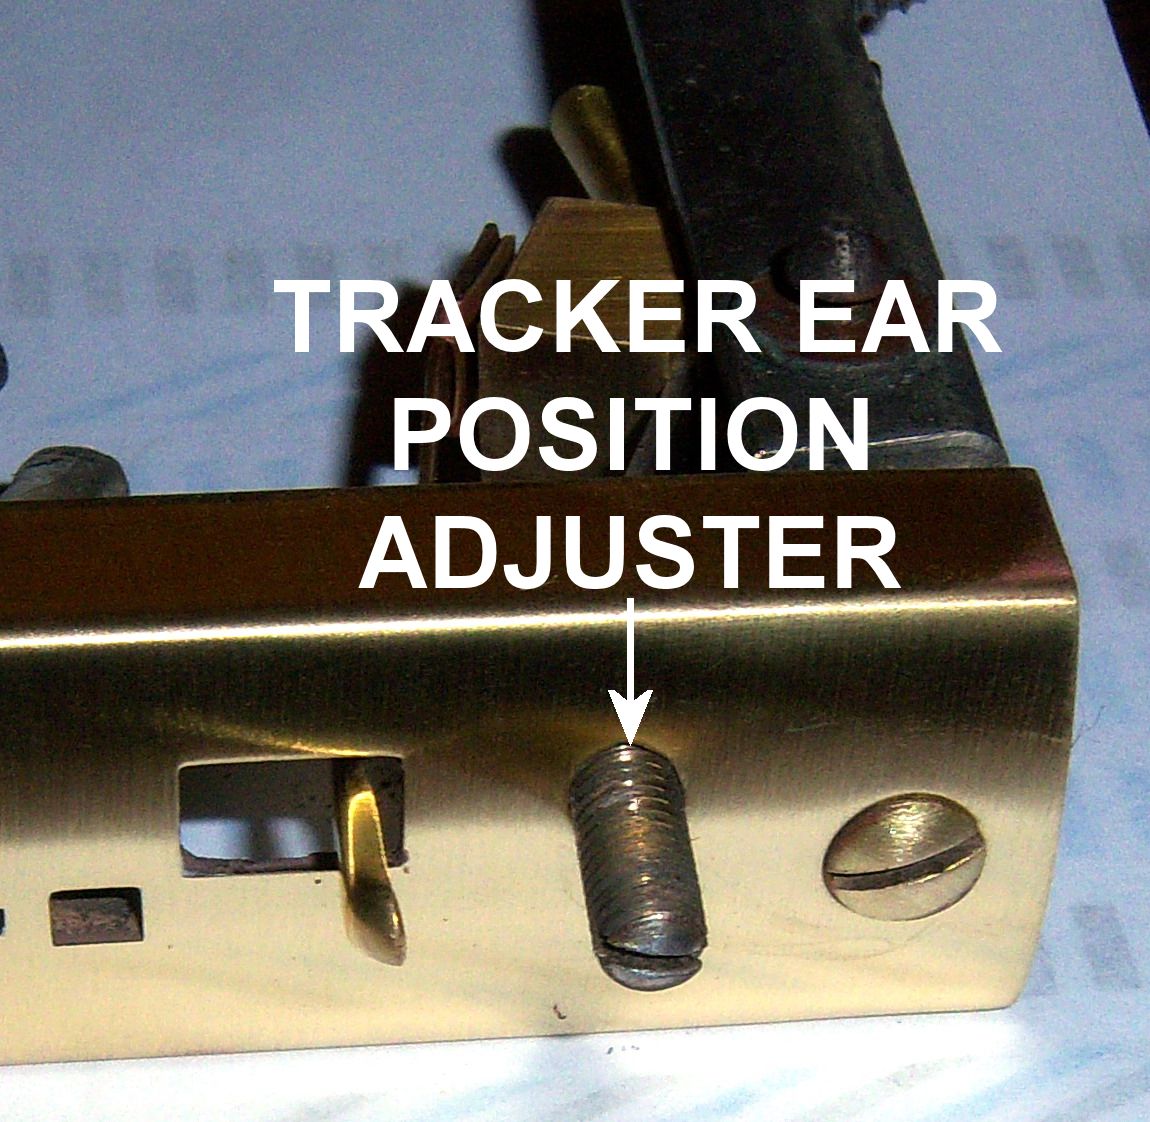 In the series of pictures below, you can see how screwing the adjuster 'in' moves the tracking finger towards the left (or inwards). In the third picture, the finger is positioned such that the distance between the left and right fingers is 11-1/4" inches. (For references sake, the hole is 3/8" wide.) 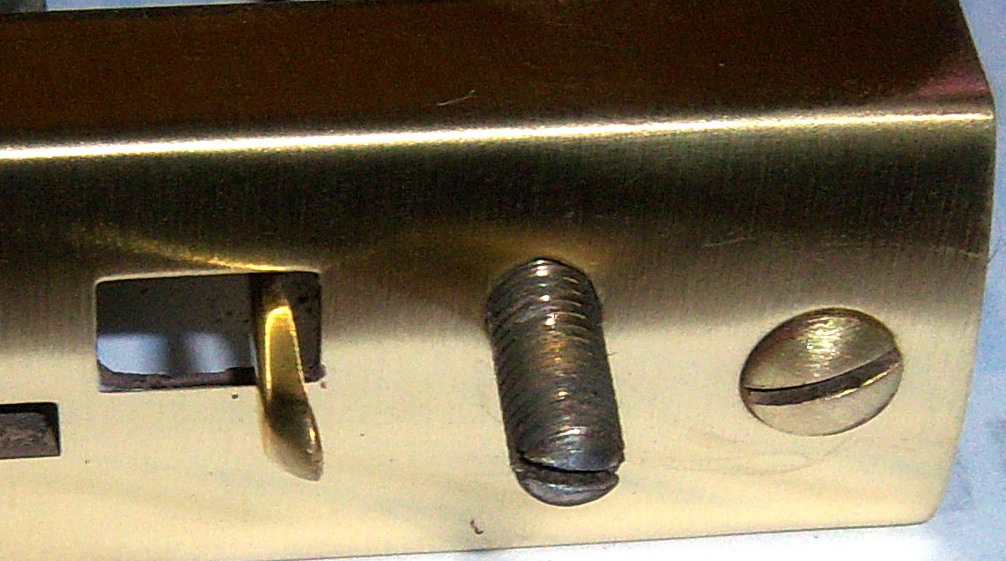
 The third problem isn't actually a design problem. It's what I would call a 'User' problem. I would imagine that the tuner/technician in the 1920's spent some amount of time educating the owner about what to do if they had rolls that didn't track well. At the same time, when you think about the fact that these instruments were typically owned by the rich, who are generally concerned about 'appearances', it seems highly unlikely that they kept a small screwdriver on the piano so they could adjust the position of the tracking fingers as needed. They would also have to remember that when the tracking system is correctly adjusted, the fingers "almost" touch the edge of the roll. Imagine how embarrassing it would be to be showing off your beautiful new Steinway Duo-Art Reproducing piano to a visiting dignitary and the roll goes off track in the middle of the song because the fingers were adjusted for a narrow roll and you put on a roll that was a bit wider... So, you 'walk' quickly to the kitchen looking for a tiny screwdriver to adjust the fingers. Then you realize that you didn't notice if the roll was tracking too far to the left or right. So, you have to play the roll again and see that the roll is tracking too far to the right. Then you think 'do I adjust the left finger or the right finger to make the roll shift left?' I point this out because the Duo-Art has a reputation of having tracking problems. However, in my opinion, a majority of those 'problems' are the result of people who don't understand how the system is suppose to function and/or know how to make minor adjustments as needed.
Making matters somewhat worse, there are no directions for adjusting the tracking fingers that are 'built in' to the trackerbar. So, for those who have read this web page to this point, here are the instructions. Refer to the diagram below and understand that #6 and #7 refer to the 'tracker finger position adjuster' mention previously. 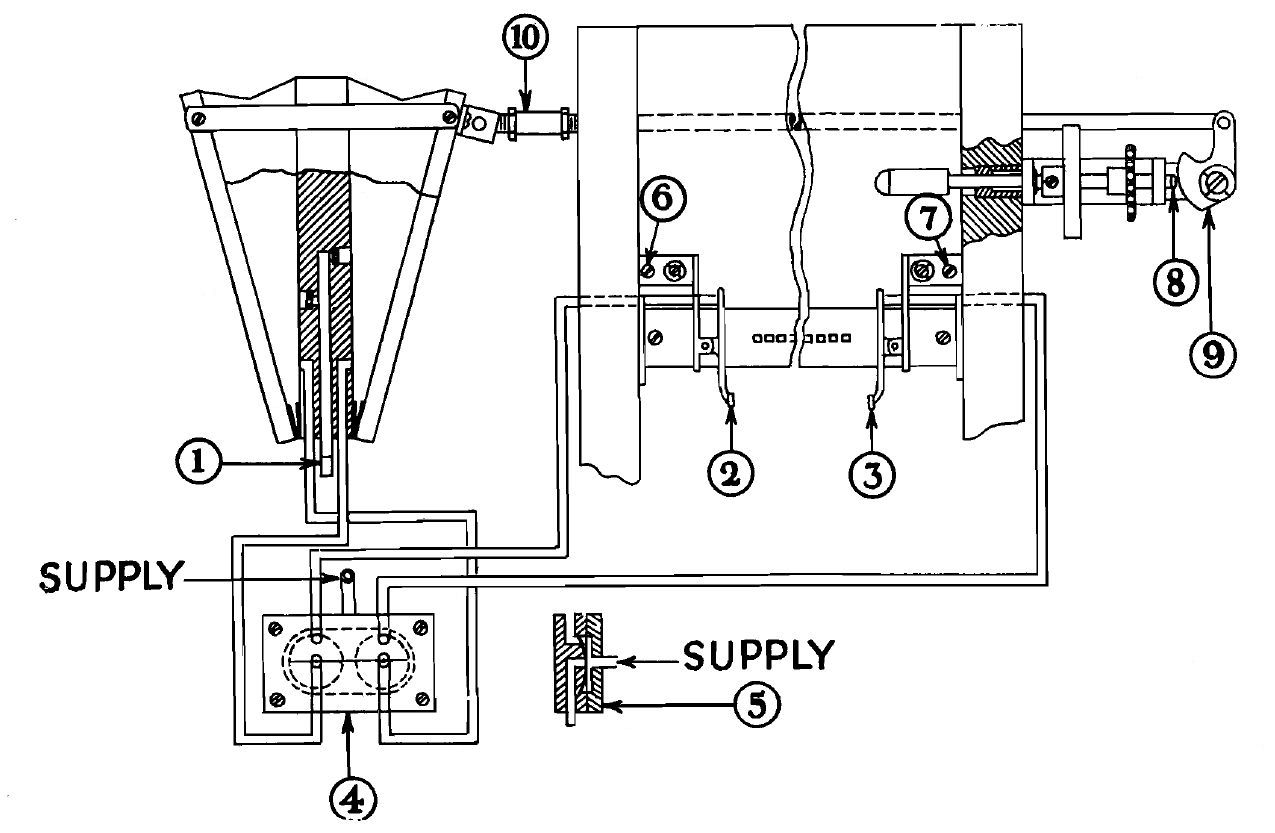
Restoring the tracking finger assembly, is not the easiest of tasks. It can't be done without removing the assembly from the trackerbar. I won't go into all of the details, but generally there are only four small bolts that have to be removed to remove the plate that covers the assemblies. Then there are two wood screws and one bolt that hold each assembly in place. Once it's out of the piano, it needs to be completely dismantled and cleaned. Here are all of the parts. 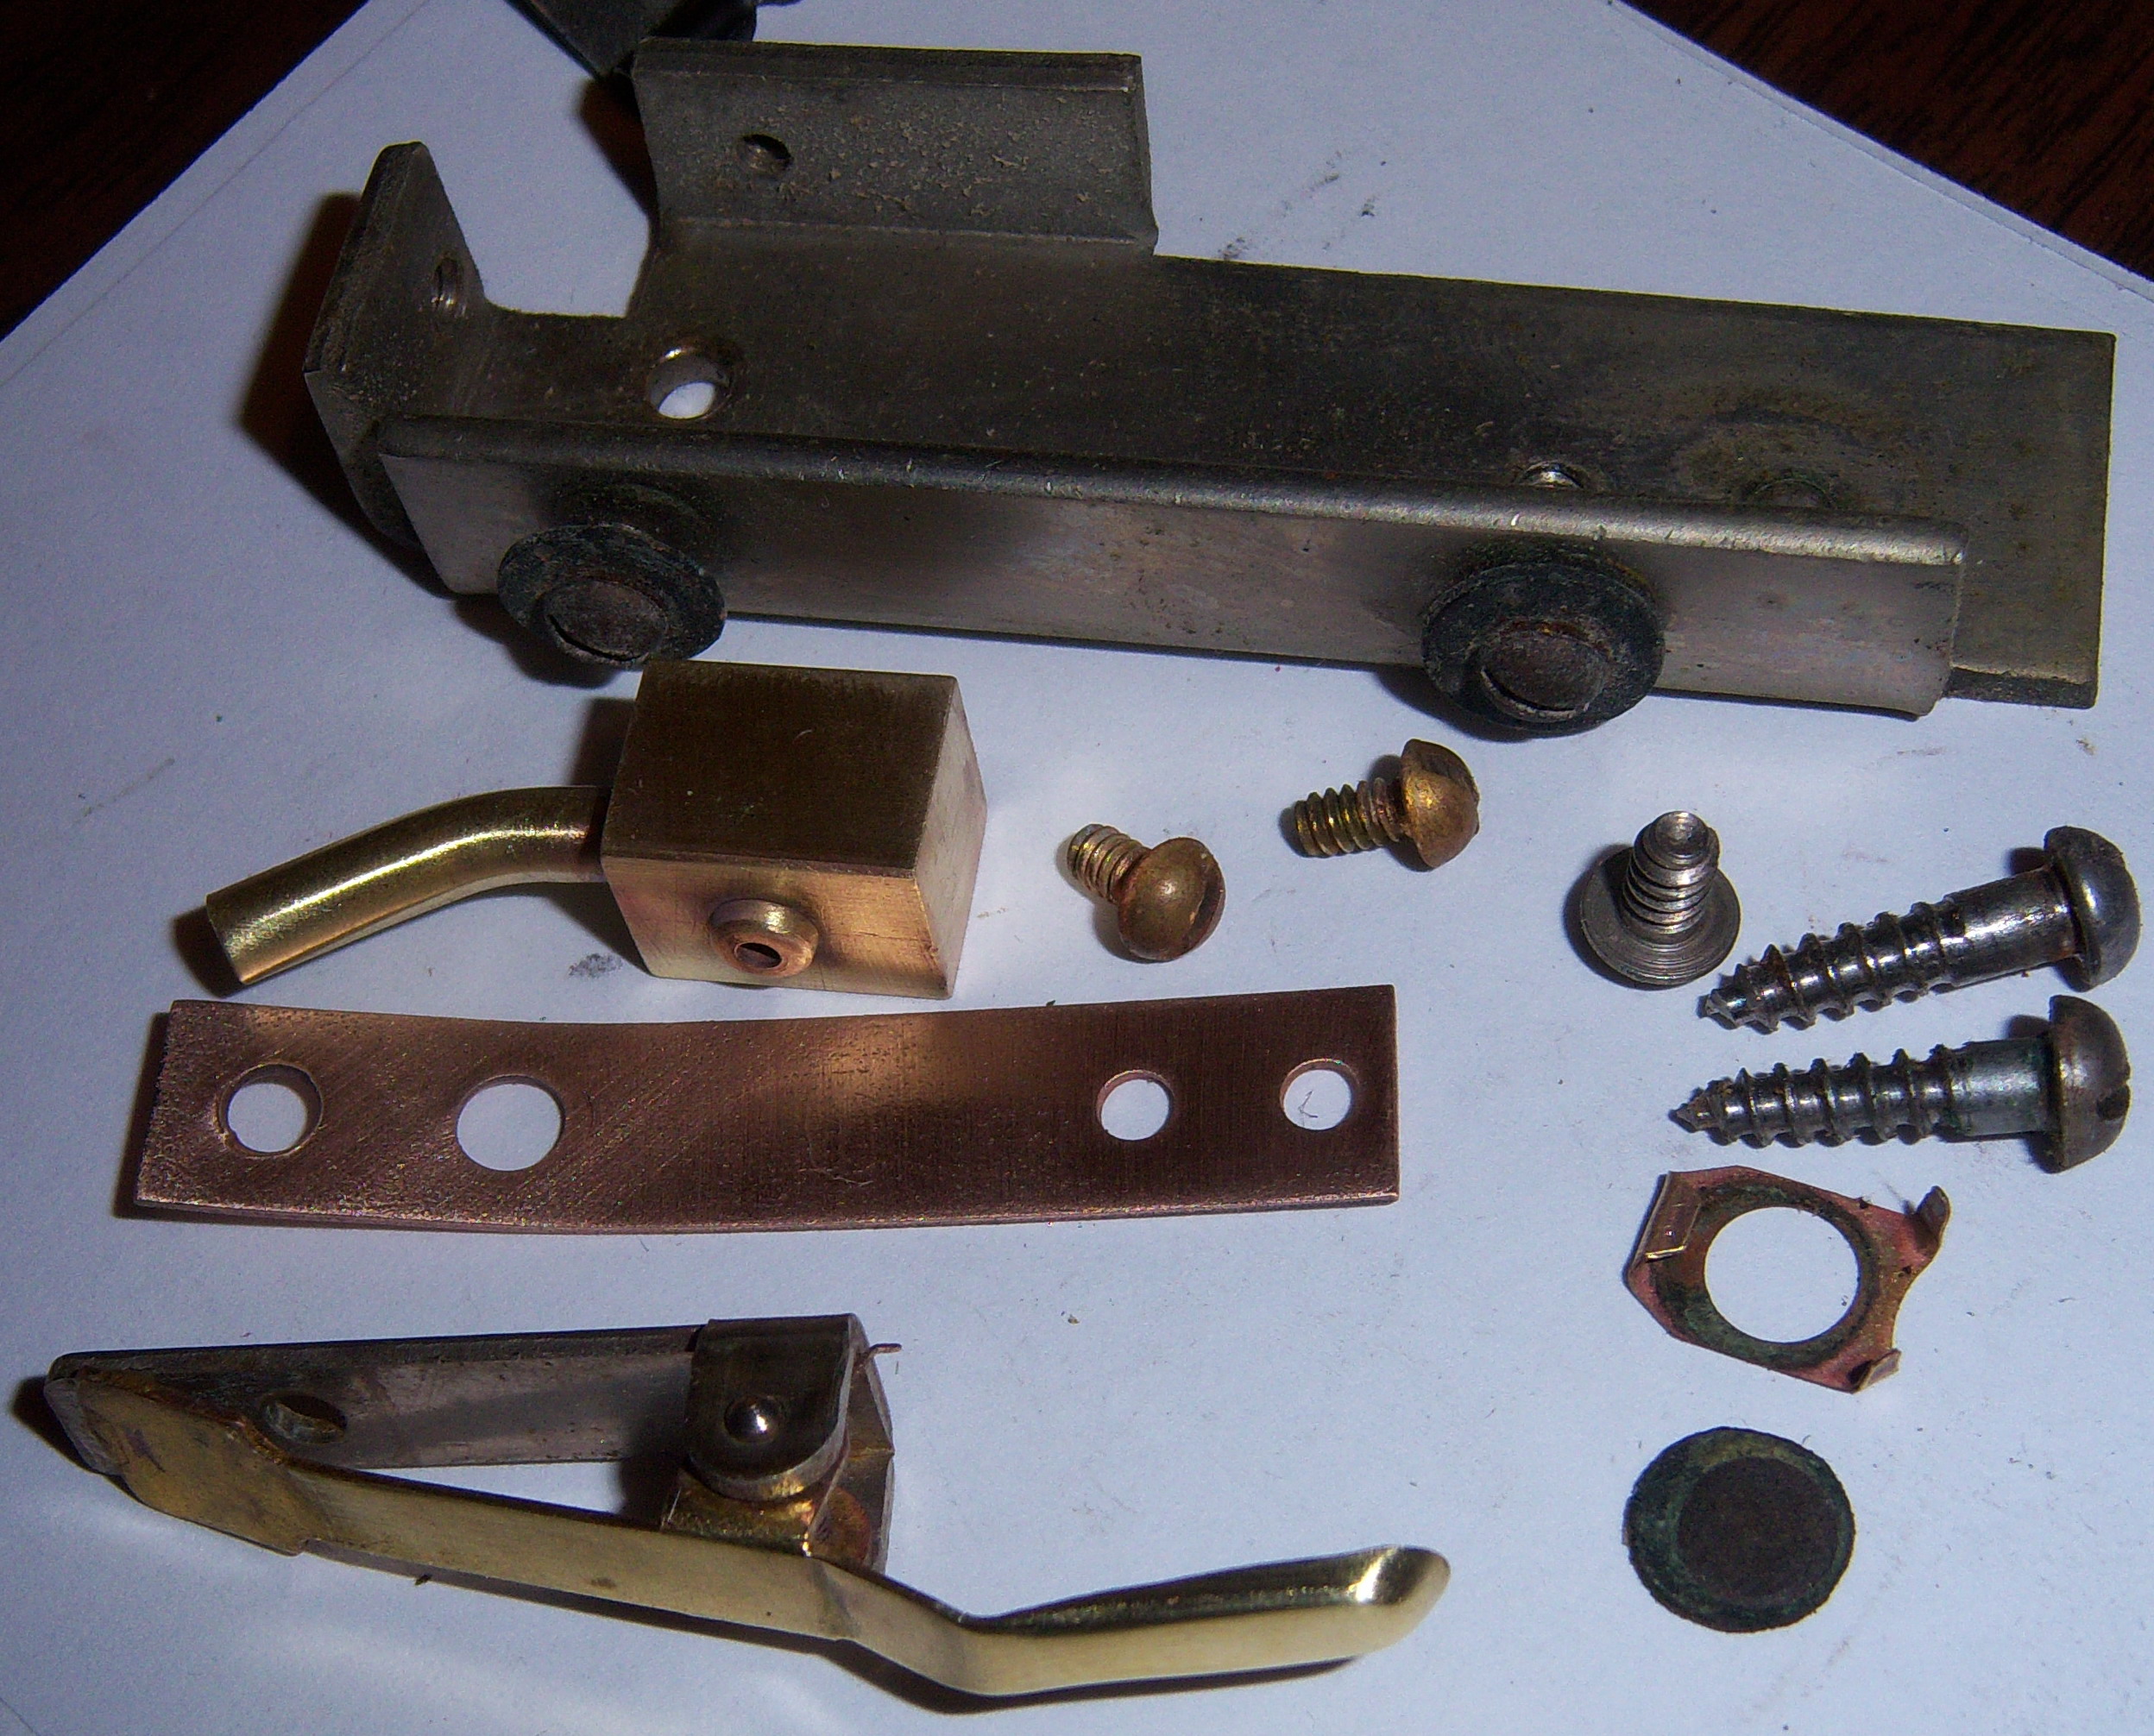 Here is a picture of what it looked like before it was cleaned and dismantled. 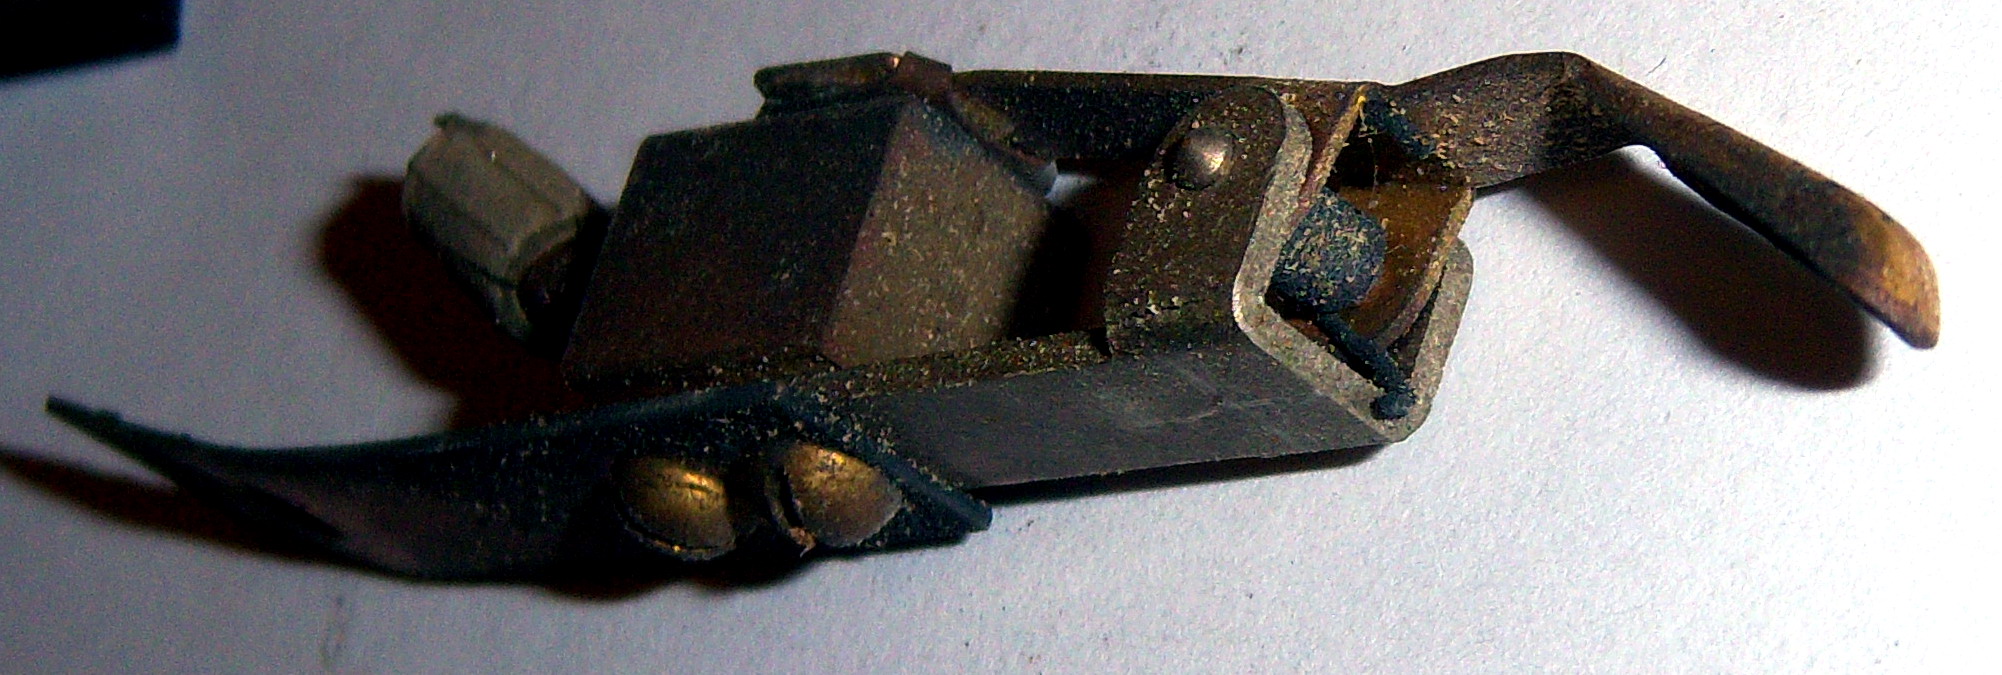 The trickiest part of the rebuilding process is removing the piece that holds the valve facing in place. It's made out of brass and it has two tiny tabs that have to be bent upwards. I used great care when bending the tabs, and only bent them enough to get the part off of the finger. The leather valve facing, which is 0.025" thick, gets glued to the finger. Slight adjustments may have to be made to the angle of the finger so that the valve facing makes flat contact with the valve seat (or port). Further adjustment may need to be made so that the finger is vertically positioned in the center of the hole in the trackerbar. In closing, I also want to note some comments that are made in the Duo-Art Service Manual which point to the fact that Aeolian knew there was a bit of a problem with their tracking system. The first one says, "It would be well to try a few rolls to see that (the) adjustment averages up well." I can only assume that they made the comment because the owner might have a bunch of rolls that are either narrower or wider than 11-1/4". The second comment is actually a warning. It reads, "By keeping a very loose brake on the takeup spool and a rather slow speed on reroll, the music roll edges will not be torn." WHAT? So, how do I, as an owner, know if my takeup spool brake (which is also known as the rewind brake) is loose enough? And, what constitutes a "rather slow speed on reroll"? These two comments clearly point to the fact that Aeolian knew their tracking system was at least somewhat problematic.
Click here for more information about Adjusting Tracking Fingers |
| Player Piano Reference Materials - Click Here |

![]() ..To
The Top of this Page . . . . . . . . . . .
..To
The Top of this Page . . . . . . . . . . . ![]() ..To The HOME Page
..To The HOME Page
|
Since "Player-Care" is an internet business, I prefer that we correspond via E-Mail (click here to fill out the 'Request Form'). However, if I'm not in the middle of some other activity, you can reach me at 732-840-8787. But please understand that during the hours from 8AM-5PM EST (Mon-Sat), I'm generally quite busy. So, I probably won't answer the phone. If you get the answering machine, please leave a detailed message stating the reason for your call. Also, repeat your name and phone number clearly and distinctly. By necessity, I prioritize everything in my life. And, if you call and just leave your name and number, and ask me to call you back, it might be a day or two before I return your call. Why? Because I don't know why you want me to call and I might not be prepared to assist you in an effective and efficient manner. If you leave me an E-Mail address (which I prefer), spell it out phonetically. The more you do to help me, the more I can help you in return. Don't rush. You have four minutes to record your message. |
|
407 19th Ave, Brick, NJ, 08724 Phone Number 732-840-8787 (Voicemail Only, No Texts) |
