
|

|

|
|
|
|
|
| Home | Manuals | Supplies | Search | Consult | Contact | Testing | Service |
|
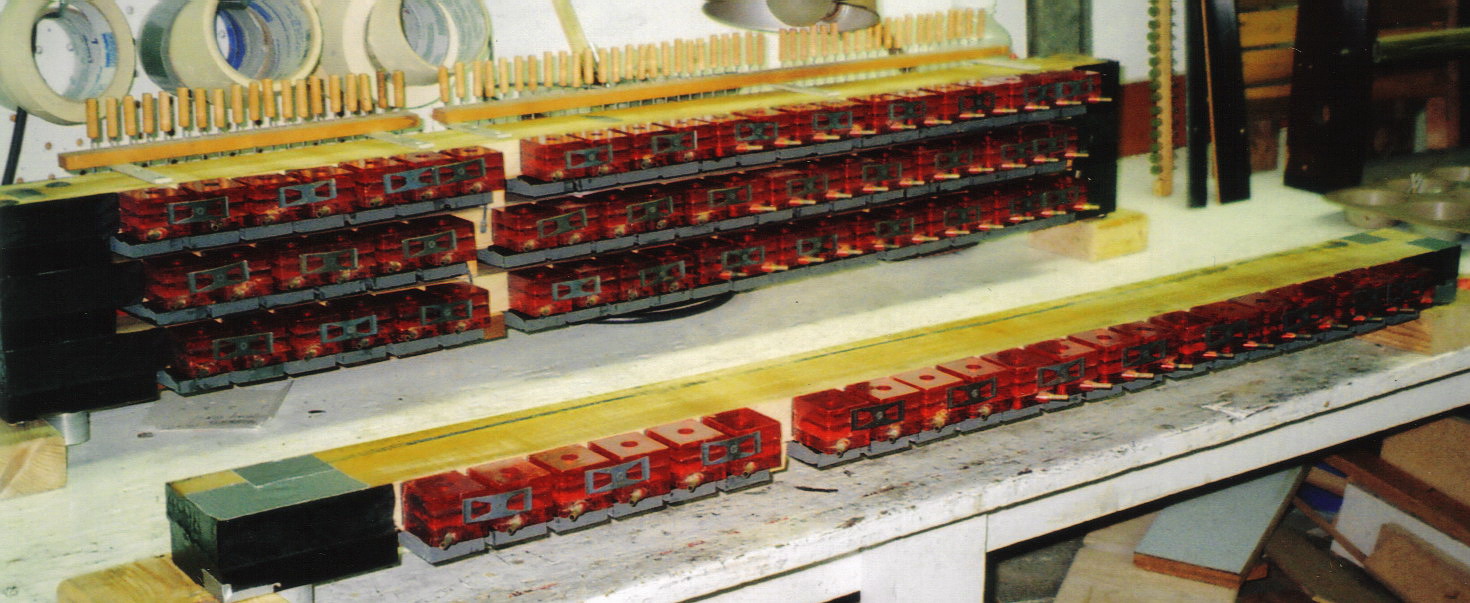
Some rebuilders believe that the best solution for the plastic valve stack is the bonfire! Not so! These pianos play remarkably well when properly rebuilt and made serviceable. The keyword being, "properly"!
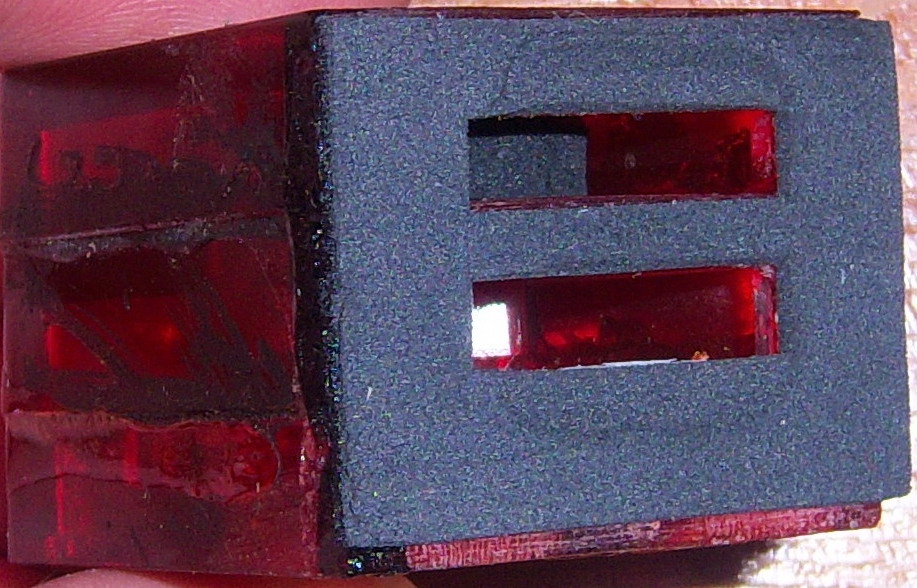
The main problem with these stacks is leakage due to improper sealing methods during the initial manufacturing process. In order to seal the stack properly, it must be completely disassembled. Since most player rebuilders are familiar with basic tear down procedures, I will not address those. I will begin my directions at the point where the stack is torn down to where the only things left are the three tiers with plastic valves attached.
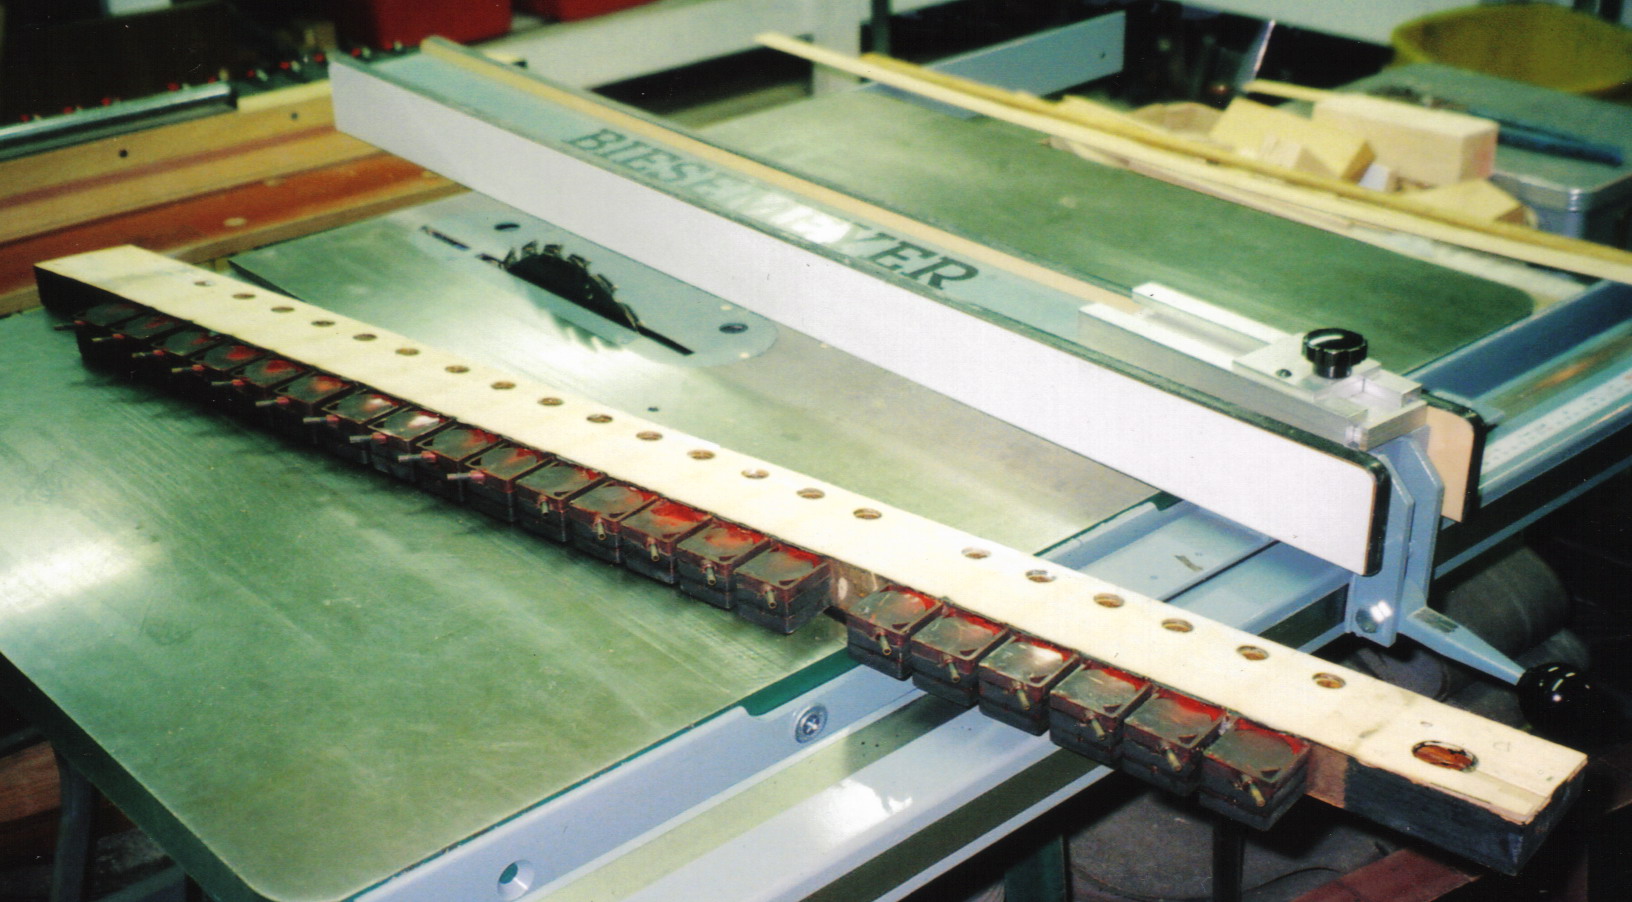 Set up an accurate table saw fence so that the fence is positioned to slice off the valves and a thin sliver of wood. Run the tiers through the saw upside down, which will give you a 90 degree reference to the blade. Under no circumstances should the saw blade contact the plastic blocks, as they will chip or shatter. Use a narrow kerf saw blade such as the Freude TFLU8710T as it has only a .094 inch kerf.
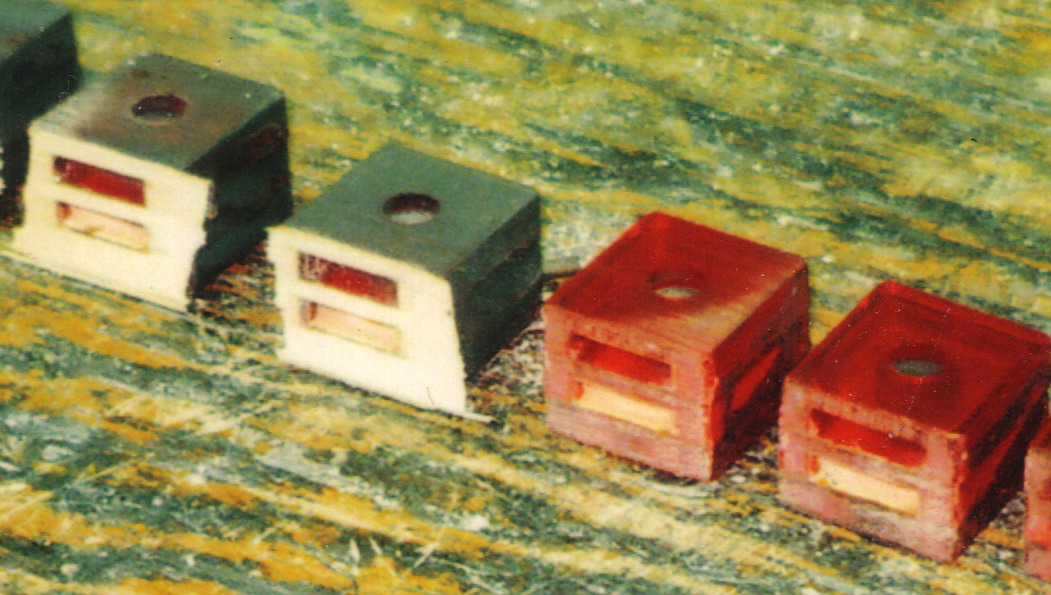
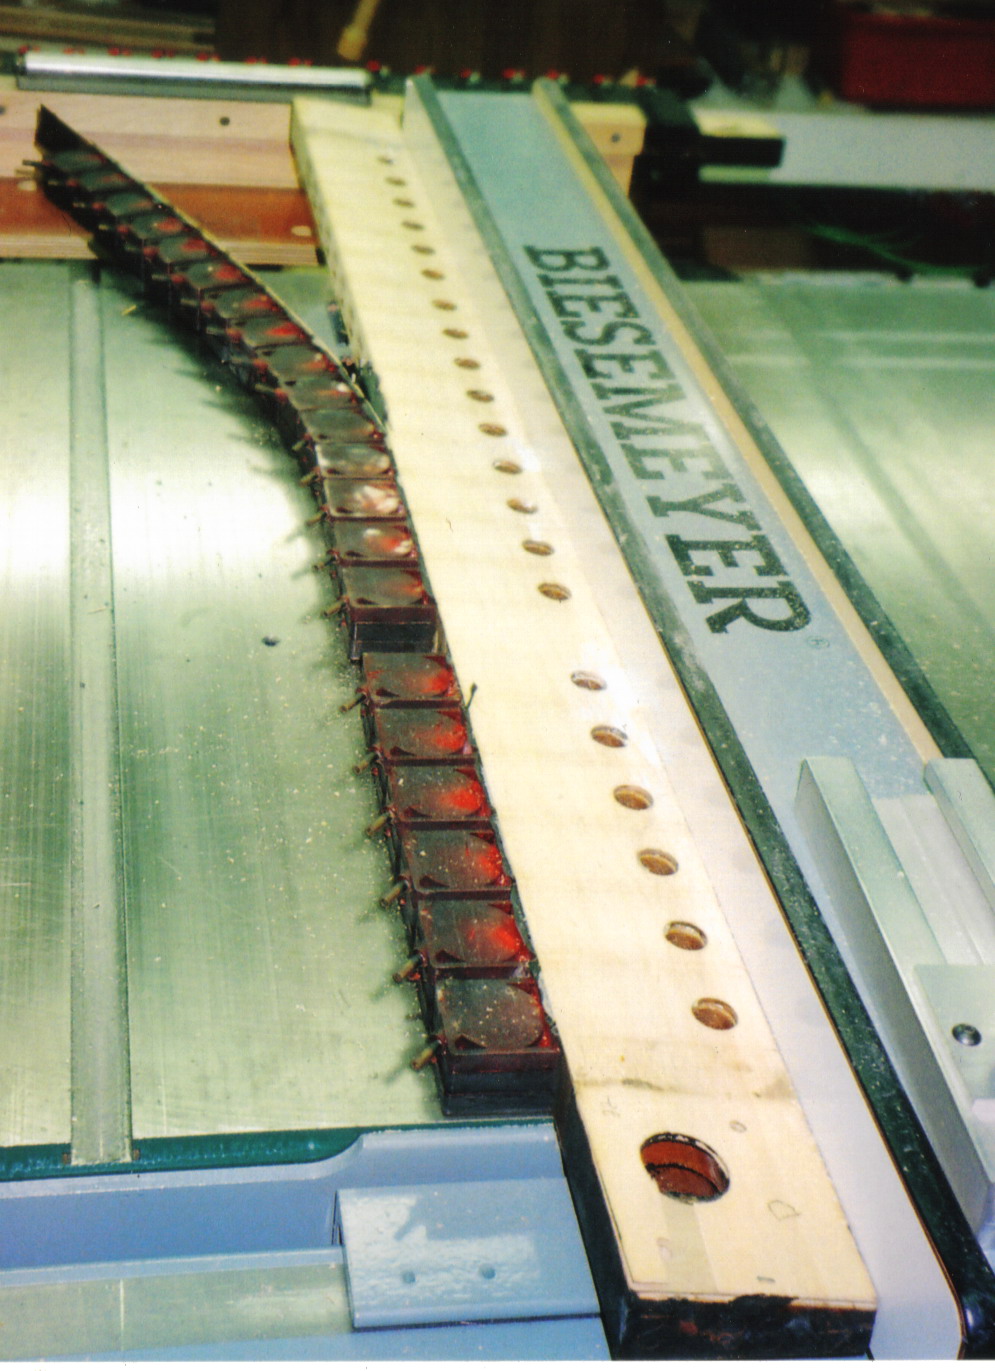 When finished, you will have all the valves and on a thin sliver of wood. They can be separated and processed on the sander. Sand the valves being sure to keep the front edge square, and then set them aside. Note the position of the signal nipples as to properly position them during reassembly.
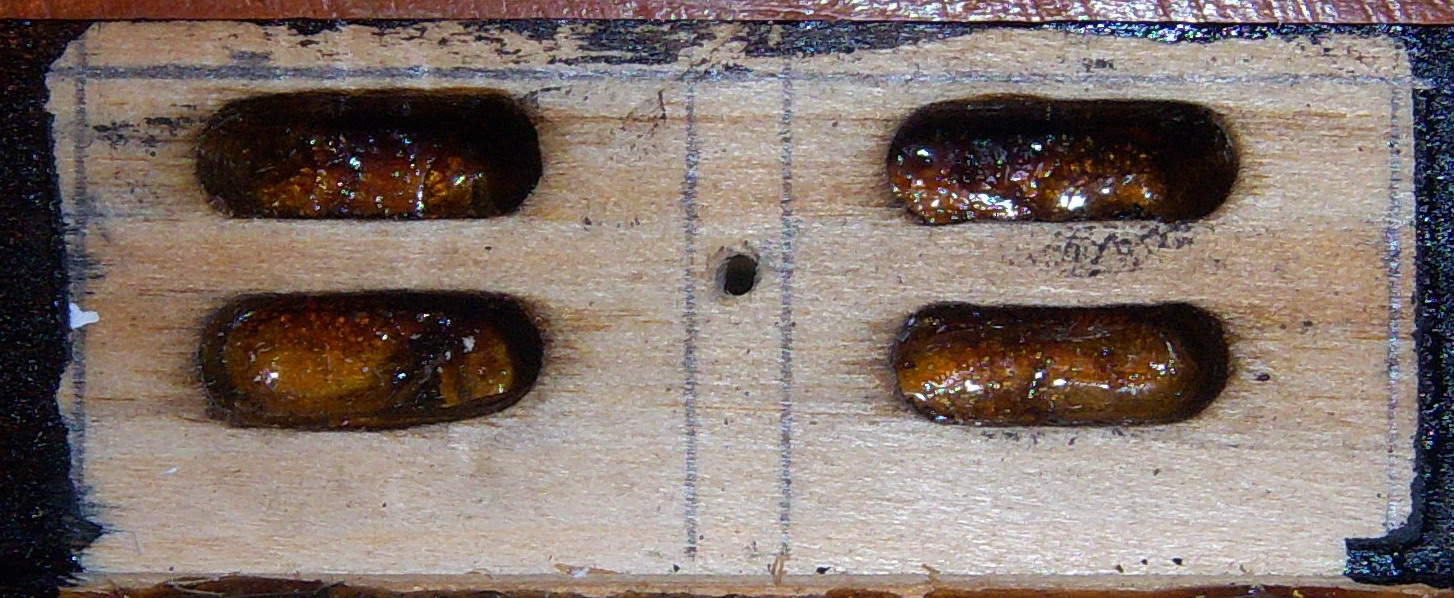
 Go over each tier very carefully looking for splits and wood separation. Re-glue any loose areas. The channels that go from the top of the valve body to the pneumatic are sealed first. Tape over the holes where the pneumatics attach to the stack, using high tack masking tape or duck tape. Using a squeeze bottle, fill up each taped channel with Phenoseal (available at Player-Care) and drain. Remove the tape and set aside to dry, preferably, in a warm area with a fan blowing on them. It's a good idea to allow at least an overnight dry on all Phenoseal applications where channels are involved, unless you force dry them with heated air. The next step is to seal the main suction channel. Tape over the bottom holes on the mounting surface and all other areas that are connected to this main suction channel, except for the large inlet. Since no organic sealers were used on this channel at the factory, it will be necessary to do so now. Using a squeeze bottle, fill up this part of the stack with lacquer sanding sealer and drain. Remove the tape, put in moving air, and dry overnight. Repeat the procedure the next day with Phenoseal. Again, with an overnight dry. Test the stack's tiers by taping up all vacuum supply areas and connecting a vacuum source. The stack should be air tight. To test the pneumatic channels, make up a tester out of plastic pipe cap one inch inside diameter. Sand the cap lip flat and install a sponge neoprene gasket. Drill a seven thirty-seconds hole in the top of the cap, and install a nipple and tube. Place this over the hole where the pneumatic glues on, with the channel taped shut on the valve end. Suck with your mouth, and cover the tube with your tongue. The channel should be air tight. If air tightness is not achieved, you need to reseal with Phenoseal again, but I have never had this happen. Usually once is enough. Sand the valve mount area to ensure flatness. Scribe a pencil line along the bottom of the top valve port. This will be the mounting screw line. You cannot put the screw in the center of the valve, as there is too little wood to allow the screw to hold. Place the valves on the stack to determine the positions of the screw and the spring holders. Mark and pre-drill the holes with a three thirty-seconds drill. Do this operation on a drill press to maintain a 90 degree hole. Drill this pilot hole five-eighths inch deep. Grind the head off one of the mounting screws and pre-thread each hole with this headless screw with a variable speed drill.
 The number six screw that will hold the valves on will be two and one quarter inches long, with the head of your choice.
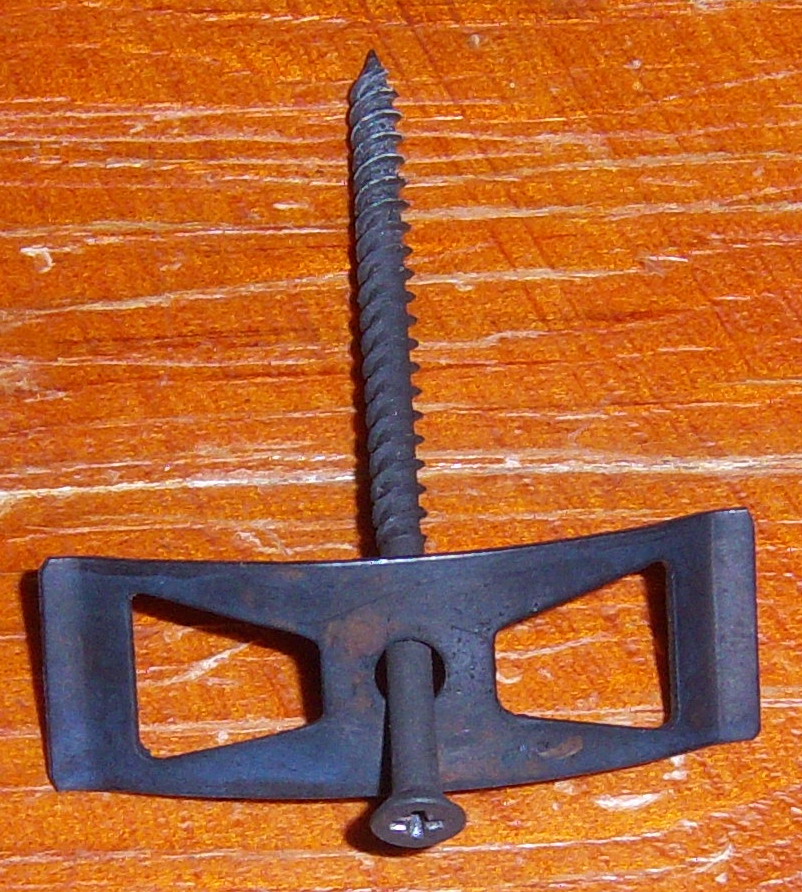
 Use the Model B Ampico Valve Springs to hold the valves in place. These are also available from Player Care. It takes very little pressure to seal the neoprene gasket. Since sponge neoprene and plastic are air tight, this stack should be airtight. Reassemble the stack making sure the nipples are pointed in the right direction, and you are finished!
 Submitted by: Nathan Woodhull, SK Piano, Lima, OH |
| Player Piano Reference Materials - Click Here |

![]() ..To
The Top of this Page . . . . . . . . . . .
..To
The Top of this Page . . . . . . . . . . . ![]() ..To The HOME Page
..To The HOME Page
|
Since "Player-Care" is an internet business, I prefer that we correspond via E-Mail (click here to fill out the 'Request Form'). However, if I'm not in the middle of some other activity, you can reach me at 732-840-8787. But please understand that during the hours from 8AM-5PM EST (Mon-Sat), I'm generally quite busy. So, I probably won't answer the phone. If you get the answering machine, please leave a detailed message stating the reason for your call. Also, repeat your name and phone number clearly and distinctly. By necessity, I prioritize everything in my life. And, if you call and just leave your name and number, and ask me to call you back, it might be a day or two before I return your call. Why? Because I don't know why you want me to call and I might not be prepared to assist you in an effective and efficient manner. If you leave me an E-Mail address (which I prefer), spell it out phonetically. The more you do to help me, the more I can help you in return. Don't rush. You have four minutes to record your message. |
|
407 19th Ave, Brick, NJ, 08724 Phone Number 732-840-8787 (Voicemail Only, No Texts) |
