
|

|

|
|
|
|
|
| Home | Manuals | Supplies | Search | Consult | Contact | Testing | Service |


Assembling and |
|
in the modern Universal player piano Here's a preview of one step in the testing process. FYI, in case there is a problem with any of the valves, which would make it necessary to take the tier back apart, I test each tier separately. This is easily done by using the end gaskets and the metal supports. You don't need to seal the ends with caulking to do the testing, but there will be a small amount of vacuum leakage at the ends. DO NOT over-tighten the screws as this could compress and damage the gasket material. Replacement gaskets ARE NOT available. So be careful!!!
The "Buzzer Valve Checker"
As I mentioned near the beginning of the treatise on replacing the pouches and valves in the modern Universal stack, it's very important that all of the gaskets go back exactly where they were originally. This is because all of them have been compressed to some degree and the indentations in each one must line up with the protrusions on the stack. Below is a video of the technique I use to align the long tier gaskets. They were marked during the removal process so they would go back exactly where they were originally. As noted in the video, a few important points are; getting the gaskets back in their comfortable resting position, installing the screws in a pattern, and snugging the screws in the same pattern. One of the mistakes that's often made when putting the tiers back together is over-tightening the screws. Doing so will degrade the performance of the stack because of insufficient valve clearance.
So, as you can see below, I have labeled the two gaskets accordingly. BTW, in case you noticed that it looks like I'm putting the left gaskets on the right end on the stack, let me assure you that that is not the case. When the stack was dismantled, it was turned the other way around. So, what you're looking at is what was the left end of the stack when it was taken apart. Although you can't see them in these pictures, I put scribe marks on the metal brackets before they are removed, and I keep the gaskets, brackets, and screws 'assembled' (as in the picture just before the brackets are screwed back onto the stack) until I'm ready to do the final assembly. 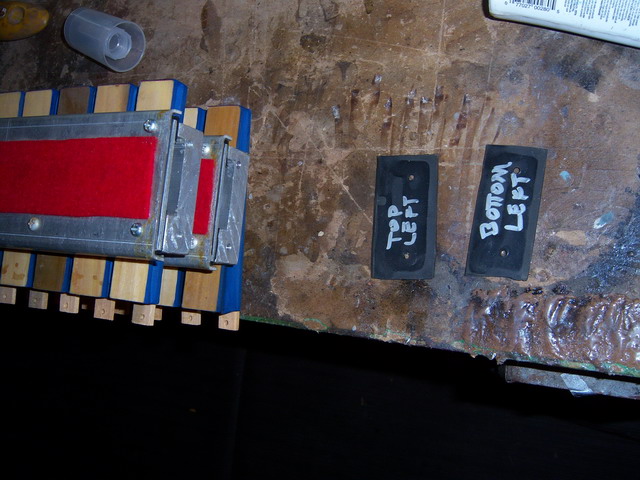
In the picture below, you can see the slight differences in the indentations in the gaskets which correspond with the slight differences in the ends of the stack. Although it's not apparent to the naked eye, the ends of the stack are NOT smooth and flat. 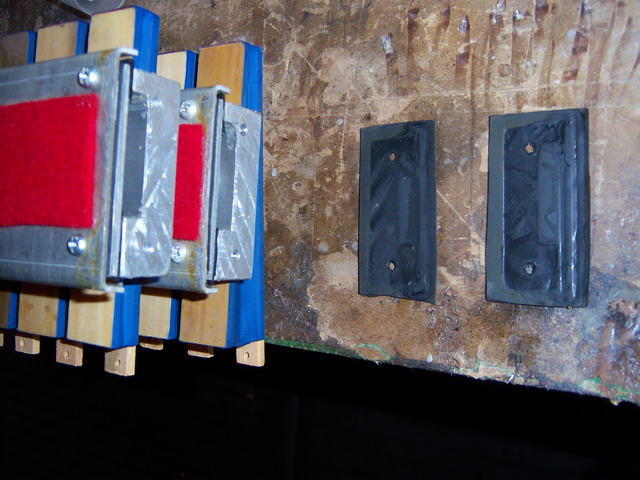
I apply the silicone caulking fairly liberally to the gasket. 
Then it is held in place by the two mounting screws. 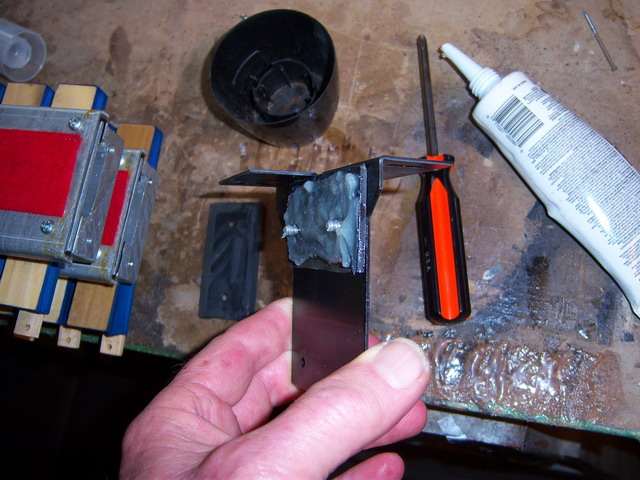
Now the end cap is ready to be installed. 
This is where it gets a little tricky. As you can see in this picture, the top tier is resting on the bottom tier. I am aligning the bottom mounting screw with its corresponding hole in the stack. 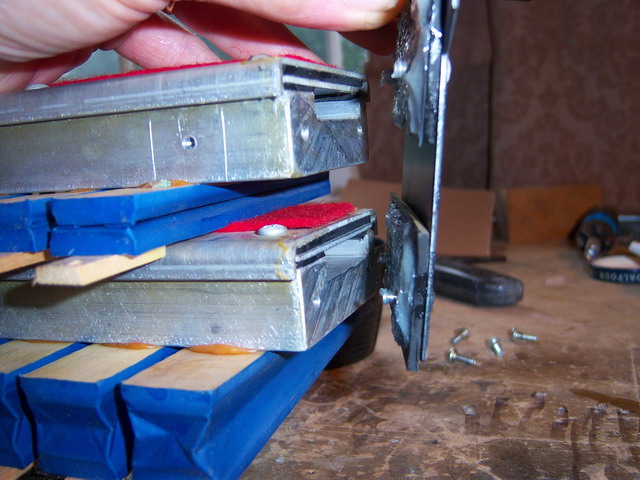
Here I have all four of the screws in place, but notice that none of them have been tightened. This is because they must all be tightened as equally as possible to squeeze the caulking as evenly as possible. I turn the screws in one revolution at a time in a continual clockwise manner until they are all 'snug' - not tight! 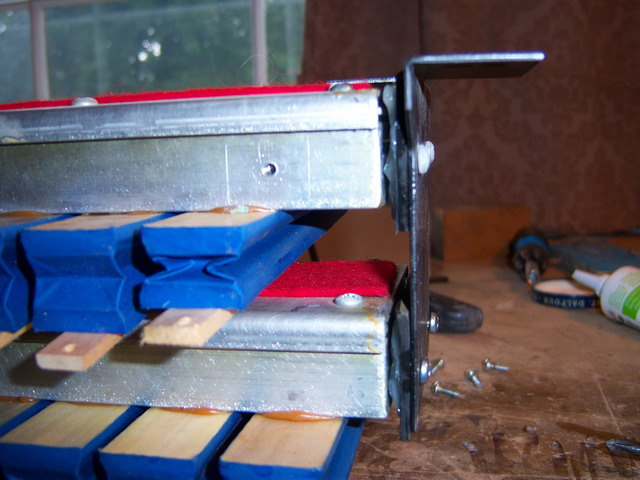
The result is a nice even squeeze of the caulking which can be seen all the way around the edges of the tier, indicating that you have a 100% air-tight seal. 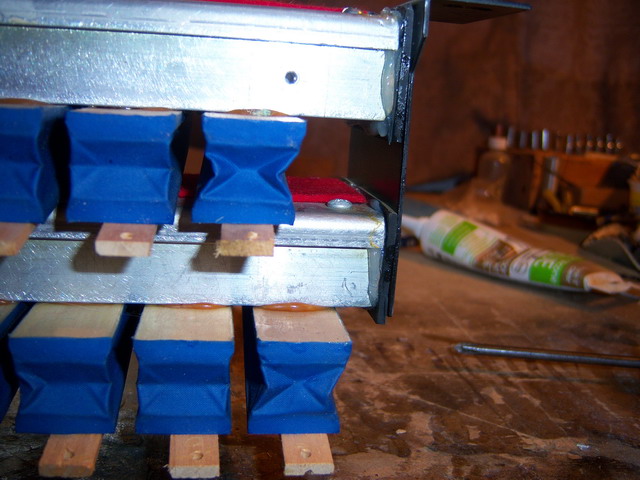
Although I don't have a picture to show the next step. After I've finished snugging all the screws, I take my index finger and smooth out the caulking, removing all the excess caulking, and creating a nice looking seal - like you would when you caulk a bathtub or a sink. BTW, I always start the sealing process with the left end of the stack. That's because the right end of the stack has the piece of aluminum tubing that supplies vacuum to the upper tier, and it also has to be sealed as the end cap is being installed. Here's a picture of the hole where the vacuum supply tube seats to the tier. Notice the old caulking/sealer. It gets completely cleaned off before re-assembly..... 
By having the left end finished before starting the right end, the spacing between the tiers has already been established and the left ends of the stack won't be moving around and disturbing the seals on the right. 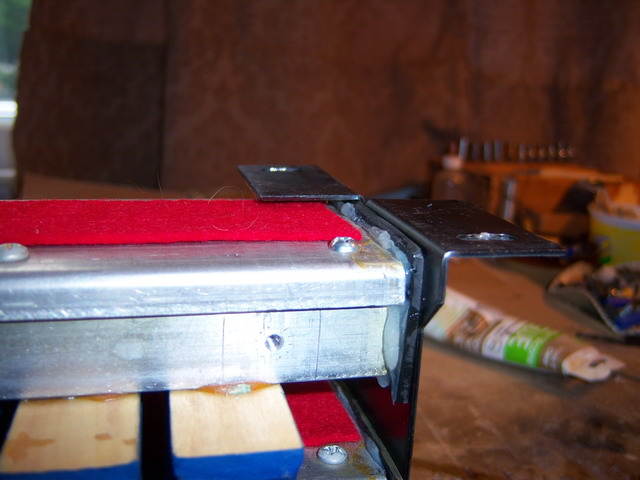
Below, I have applied a small ring of Phenoseal around the hole where the striker rod assembly is mounted. As you can see in the previous picture, there are indentations in the aluminum where the star washer was located. You can also see the scribe marks that I made on the aluminum before removing the assembly. If you didn't mark the position of the assemblies, just remember that the sticker rods should be pointing straight up, not at an angle. (Occasionally, there will be one or two rods that are tilted left or right. Ignore them and focus on the majority of the rods.) 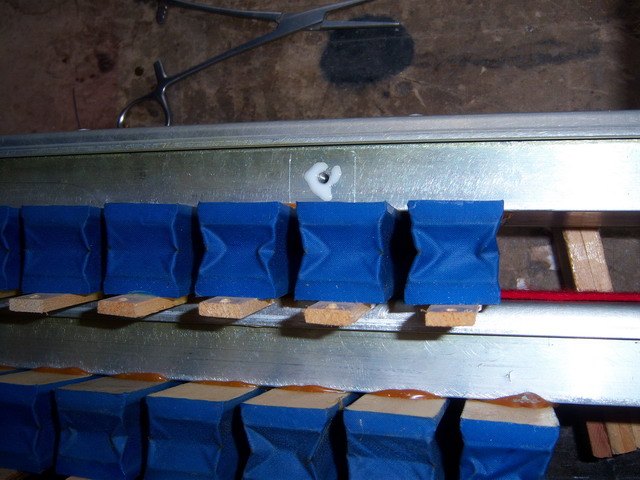
Here I'm placing the star washer into position using a nail as a guide. I'm doing this because it's quite a challenge to keep the star washer correctly positioned once the assembly is placed over the washer. 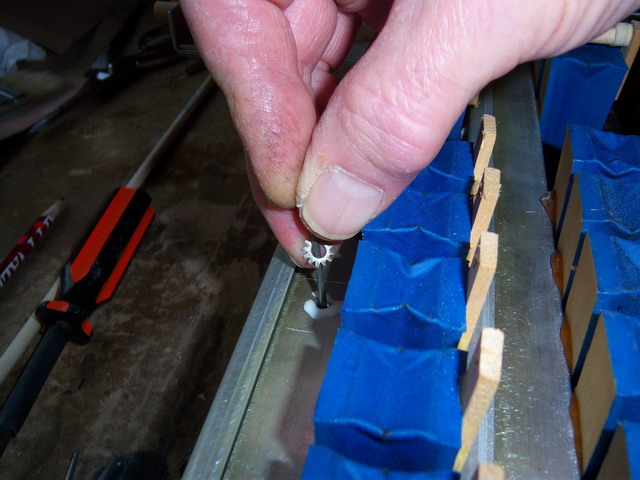
Finally, I'm doing a little more positioning to insure that the washer is perfectly positioned over the screw hole. Once the Phenoseal dries, aligning the assembly with the hole and putting in the screw is a piece of cake. Without the star washer being 'secured' in place, getting the washer, the assembly, and the screw properly aligned is a real pain. Also, in total there twelve of these washers. Why the manufacturer didn't add this simple step to the assembly process has always been a mystery to me. 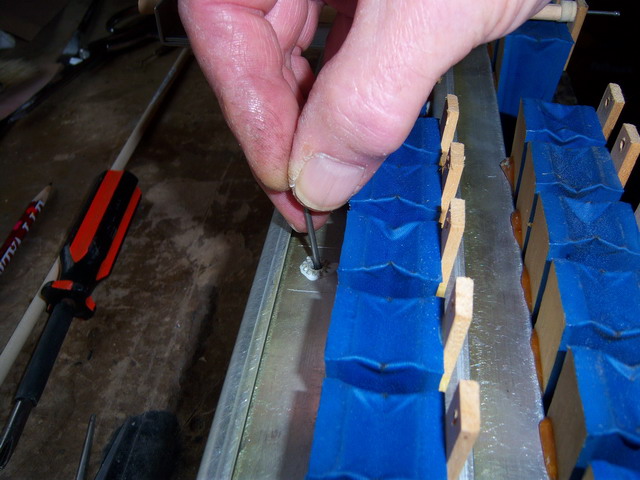
Next, the sticker rod assemblies are screwed back in place, and the rods are attached to the pneumatic fingers. (No picture available for this step.) Now the stack is ready to be regulated. Here we have a 'Before' picture of the rods. 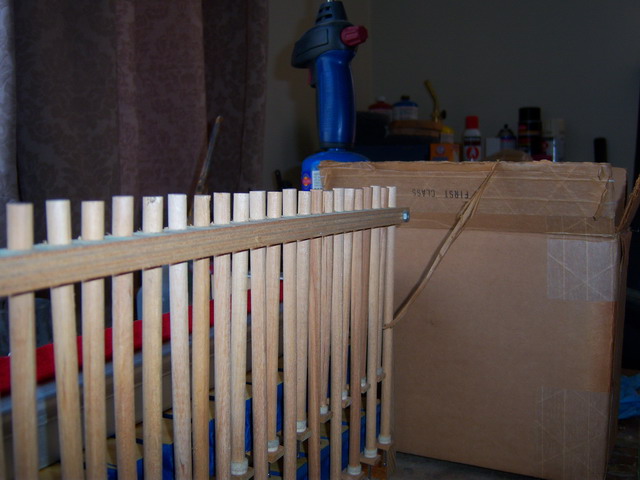
Below is another picture of the rods before they have been regulated. Regulating the rods means bringing them all to the same height. In almost all cases, the correct way to do this begins by finding the tallest rod in all three sections, or the tallest rods in the assembly on the right and the assembly on the left. However, if there's a rod in the center section that's taller than all the rest, it must serve as the guide for all of the other rods. Notice the two rods on the far left and the rod on the far right. As it turned out with this job, they are the highest rods in the stack. So, they get used as the reference point for all the rest of the rods. (see NOTE below) Also, notice how poorly regulated the are were before they got regulated. What you're actually looking at here is the "lost motion' between the sticker rods and the piano keys. Lost motion in a player action relates directly to a loss in volume (or loudness). Assuming that the vacuum level inside the stack remains constant, as the lost motion between the sticker rod and the piano key increases, the intensity with which the key is struck decreases proportionally. In this case, where there was as much as 1/8" of difference in the height of the rods (between the shortest and the tallest), and considering that the key only moves 3/8", there would be a 30% difference in volume between the note with the tallest rod and the one with the shortest rod. That's a huge difference, musically speaking. 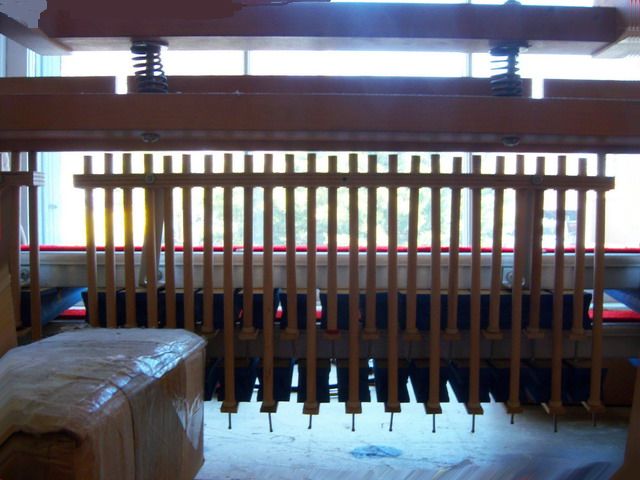 The logic behind this approach is that none of the rods were so tall (when the stack was in the piano -before it was removed) that they were causing a key on the piano to be even slightly activated. And, since the back end of the keys (which the rods 'push on') all rest on the back rail felt (which is level all the way across the key bed), it only makes sense to use the tallest rod as the guide (or reference point) for all the other rods. 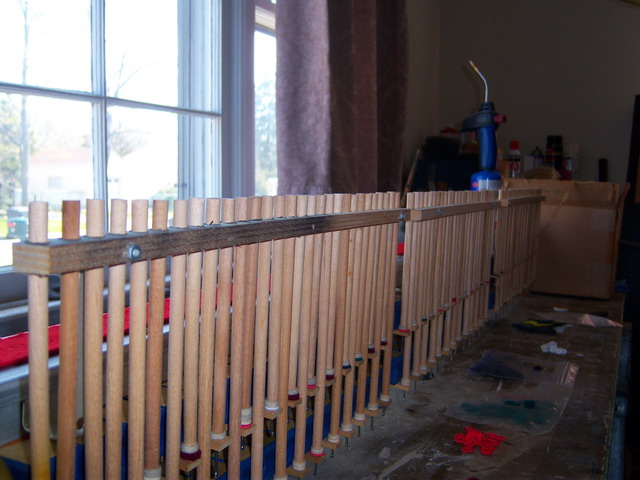
Above is the finished product. I've hyperlinked this picture to the fullsize picture so you can more clearly see the colored punchings that are used to regulate the height of the rods. The punchings vary in thickness from about 0.025" down to 0.005". By using various combinations of punchings, it's possible to get all of the rods within just a few thousandths all the way across the scale. Just for fun, I decided to see how fast the valves in the Universal could actually cycle. (See video below) Using my 'buzzer' device, I found that the valve could cycle at over 100 repetitions per second. Obviously, the bellows can't fully open and close that fast. However, what this somewhat proves is that the valves in a player piano can typically cycle much faster than the piano action. The "Buzzer Valve Checker -Speed Test" |

|
Since "Player-Care" is an internet business, I prefer that we correspond via E-Mail (click here to fill out the 'Request Form'). However, if I'm not in the middle of some other activity, you can reach me at 732-840-8787. But please understand that during the hours from 8AM-5PM EST (Mon-Sat), I'm generally quite busy. So, I probably won't answer the phone. If you get the answering machine, please leave a detailed message stating the reason for your call. Also, repeat your name and phone number clearly and distinctly. By necessity, I prioritize everything in my life. And, if you call and just leave your name and number, and ask me to call you back, it might be a day or two before I return your call. Why? Because I don't know why you want me to call and I might not be prepared to assist you in an effective and efficient manner. If you leave me an E-Mail address (which I prefer), spell it out phonetically. The more you do to help me, the more I can help you in return. Don't rush. You have four minutes to record your message. |
|
407 19th Ave, Brick, NJ, 08724 Phone Number 732-840-8787 (Voicemail Only, No Texts) |
