
|

|

|
|
|
|
|
| Home | Manuals | Supplies | Search | Consult | Contact | Testing | Service |
|
A client delivered to my shop a small, upright 85-note player piano of English manufacture in need of a full pneumatic rebuilding. The name "Priestley" was on the fall board; the letter "E" was on each pedal mat (reminding me of the big "P" on the Aeolian Pianolas) (Illus. 0). 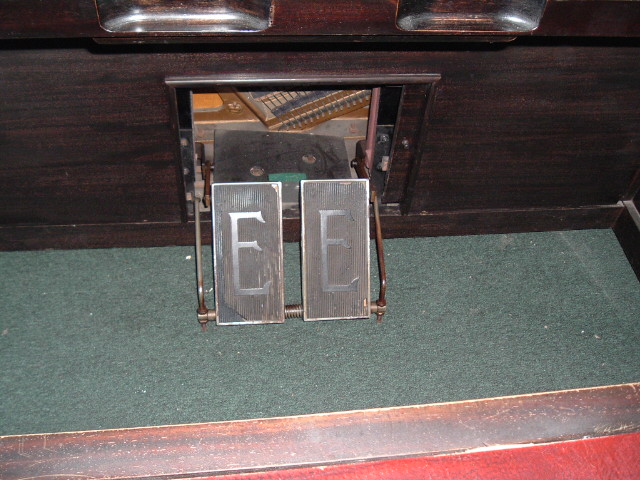 Removing the fallboard assembly, the name "Eastonola Minor" was decaled on the upper deck of the two-tiered stack; a stack of less common architecture than usually found (illus. 1). 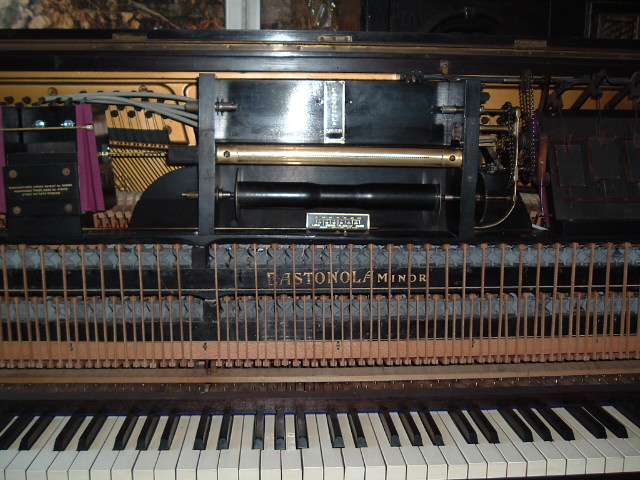 The lower section is fairly straight ahead, and any technician with a modicum of rebuilding experience should have no difficulty with it. The same is true for the Standard Action style tracking governor and wind (vacuum) motor. There is a slide valve mounted behind the spoolbox to channel vacuum from play position to re-roll, with the play/re-roll lever mounted in the upper right section of the spoolbox. Be certain to make a tubing diagram to identify origin and destination of the three signal tubes. The nicotine-stained aquarium tubing is shown on this slide valve in illus. 2. 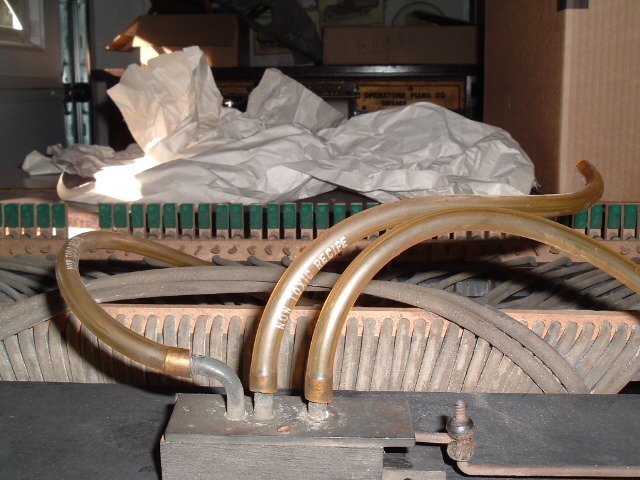 After removing the three control tubes to spoolbox slide valve, unscrew spoolbox brace. Locate the four stack mounting screws (two at each end) and remove (Illus. 3). 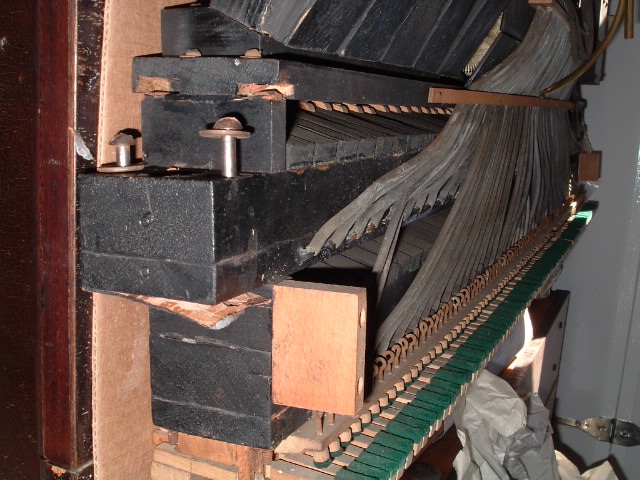 Before removing unit, set up two 4X4 wood blocks on your workbench to set stack upon. The left side bench mounting block may be drilled out with a fitting placed on it for later testing- ready to attach to your adjustable vacuum test pump. Tilt stack forward slightly, sliding back, then up and out to remove from piano. Once the levers and ancillary assemblies are removed, deck at a time, the stack may be taken apart (illus 4, 5 & 6). 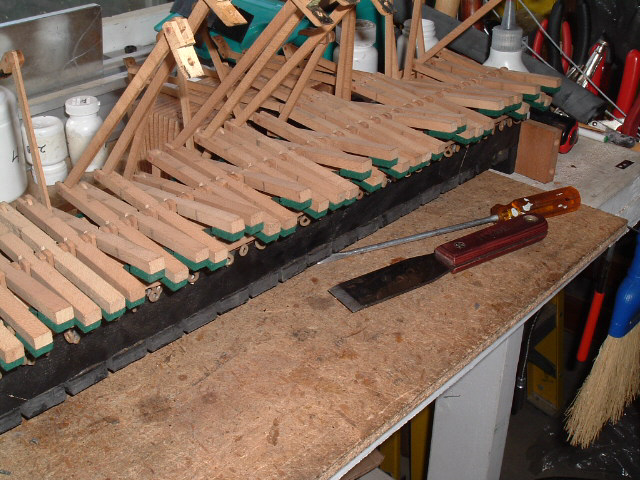 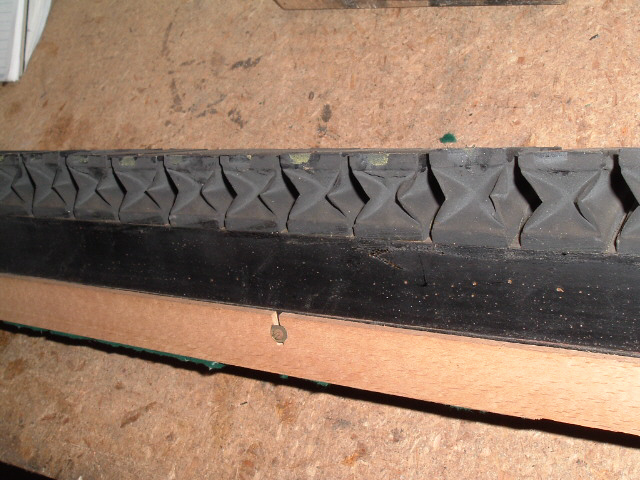 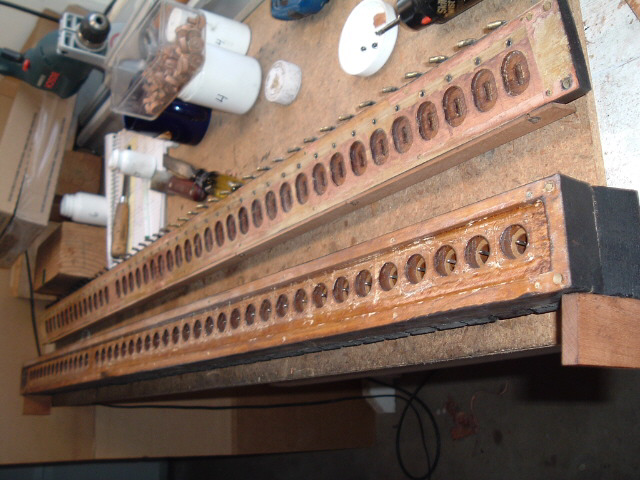 Upon first examination, the valves may seem like small Aeolian examples (illus. 7). 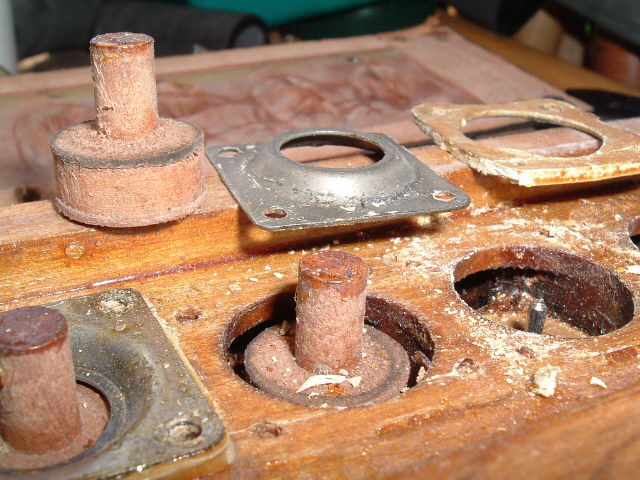 Not so. This is an "economy" model action that is very unforgiving and has no room for leakage of any kind. After removing the valves, in notated order, carefully remove pneumatics. It is not this writer's intention to discuss general restoration technique in this article, but suffice it to say that you have my most sincere sympathy if rebuilding this action is your first or second rebuilding project. This stack should be left to a competent, experienced professional! With that said, here are some general observations I have made: I suggest that a good quality #100-120 sandpaper be used for a punching glued to the top of a valve (once of course the old leather has been removed and surface has been inspected to be absolutely true). This valve may be placed in each well and manually rotated to smooth the upper wood orifices, which often are not only dirty, but occasionally found to have deep ravines from sloppy factory drilling. The stack must have originally leaked when many of the valves supposedly were "sealing" atmosphere! It is also absolutely critical that a high-quality white alum valve leather of 1/32" thickness be used to preserve the .035" valve travel needed- the leather must be the softest money can buy. Use the rough side against the wood orifice (upper) and the smooth side against the lower or metal seat. The metal valve seats originally used a latex-type gasket material, which in the action I rebuilt, had either hardened to a rigid substance or disintegrating into mysterious "goo". I recommend substituting 1/16" thickness sheet cork or cork-rubber composition. Carefully paint an edge seal of Phenoseal after screwing down tightly and checking valve travel. Speaking of Phenoseal, be sure to seal all channels and interior wood passages with it, especially the control holes drilled into the pouch board. This action behooves you to remove all brass nipples and of course bleeds for thorough Pheno-sealing. The Pouch Board: An unusual oval pouch well is covered with extra-thin pouch leather laid in wide strips. The pouches are carefully dished by hand. And before the glue dries, but after it has set, carefully use a veneer roller to press the leather against the wood, particularly between pouches. This requires meticulous glue technique (I recommend Fish Glue for this operation to allow for a little more time than hot glue affords). After sealing the leather, be careful to replace the thick, small lifter discs on the pouches EXACTLY under where the valve stem will sit, which often is off-center to the oval well (when you initially remove valve board from pouch board, peer down the length of the decks and observe how the valve stems line up over the pouches).. Be careful! Buy a new set of #68 bleeds. As with some Duo-Art stacks, a variance of bleed hole size to compensate for leather seepage in unsealed pouches was found in this action. Conclusion: Not only are the stack pneumatics undersized, but they are over-taxed with the amount of levers and linkages required to play a note. The overall craftsmanship of original manufacture is even poorer than the design and engineering of this action. It is this writer's hope that this article be of some help to you should you have the misfortune to encounter an Eastonola Minor action. Good Luck. |
Player-Care Accepts These Cards

![]()
|
Since "Player-Care" is an internet business, I prefer that we correspond via E-Mail (click here to fill out the 'Request Form'). However, if I'm not in the middle of some other activity, you can reach me at 732-840-8787. But please understand that during the hours from 8AM-5PM EST (Mon-Sat), I'm generally quite busy. So, I probably won't answer the phone. If you get the answering machine, please leave a detailed message stating the reason for your call. Also, repeat your name and phone number clearly and distinctly. By necessity, I prioritize everything in my life. And, if you call and just leave your name and number, and ask me to call you back, it might be a day or two before I return your call. Why? Because I don't know why you want me to call and I might not be prepared to assist you in an effective and efficient manner. If you leave me an E-Mail address (which I prefer), spell it out phonetically. The more you do to help me, the more I can help you in return. Don't rush. You have four minutes to record your message. |
|
407 19th Ave, Brick, NJ, 08724 Phone Number 732-840-8787 (Voicemail Only, No Texts) |
